#graphql resolver arguments
Explore tagged Tumblr posts
Visit Tumblr Blog
Explore Tumblr blogs with no restrictions, modern design and the best experience.
Last Seen Tumblr Blogs


Fun Fact
Tumblr’s website traffic is steadily declining.
Text
GraphQL Resolver Explained with Examples for API Developers
Full Video Link - https://youtube.com/shorts/PlntZ5ekq0U Hi, a new #video on #graphql #resolver published on #codeonedigest #youtube channel. @java @awscloud @AWSCloudIndia @YouTube #youtube @codeonedigest #graphql #graphqlresolver #codeo
Resolver is a collection of functions that generate response for a GraphQL query. Actually, resolver acts as a GraphQL query handler. Every resolver function in a GraphQL schema accepts four positional arguments. Root – The object that contains the result returned from the resolver on the parent field. args – An object with the arguments passed into the field in the query. context – This is…

View On WordPress
#graphql#graphql api project#graphql example tutorial#graphql resolver arguments#graphql resolver async#graphql resolver best practices#graphql resolver chain#graphql resolver example#graphql resolver example java#graphql resolver field#graphql resolver functions#graphql resolver interface#graphql resolver java#graphql resolver mutation#graphql resolvers#graphql resolvers explained#graphql resolvers tutorial#graphql tutorial#what is graphql
0 notes
Text
This Week in Rust 462
Hello and welcome to another issue of This Week in Rust! Rust is a programming language empowering everyone to build reliable and efficient software. This is a weekly summary of its progress and community. Want something mentioned? Tweet us at @ThisWeekInRust or send us a pull request. Want to get involved? We love contributions.
This Week in Rust is openly developed on GitHub. If you find any errors in this week's issue, please submit a PR.
Updates from Rust Community
Official
Announcing Rust 1.64.0 | Rust Blog
Newsletters
This Month in Rust GameDev #37 - August 2022
Project/Tooling Updates
rust-analyzer - changelog #148
IntelliJ Rust Changelog #179
Announcing async-dns
Fornjot - Weekly Release - 2022-W39
gitoxide - August: Useful rev-spec parsing and an abstraction for remotes
Getting Started with Seaography - A GraphQL framework for SeaORM
Observations/Thoughts
Internship Projects 2022: Concrete Playback
Why Volvo thinks you should have Rust in your car
Linux embracing Rust will boost robotics community
Better Java logging, inspired by Clojure and Rust
Why Async Rust
Apache APISIX loves Rust! (and me too)
Safe pinned initialization
Enabling Rapid Pulumi Prototyping with Rust
STM32F4 Embedded Rust at the HAL: SPI with the MAX7219 LED Dot Matrix
[audio] Rustacean Station: Ockam with Mrinal Wadhwa
Rust Walkthroughs
Building a Real-Time Web Cipher with Rust, Sycamore and Trunk
Dyn async traits, part 9: call-site selection
Rust 2024...the year of everywhere?
Building Nix flakes from Rust workspaces
Accessing Firebird With Diesel and Rust
Multithreading in Rust
Flutter and Rust combined
Miscellaneous
[DE] CTO von MS Azure: Nehmt Rust für neue Projekte und erklärt C/C++ für überholt!
[DE] Rust Foundation erhält 460.000 US-Dollar und gründet ein Team für Security
[DE] Programmiersprache Rust 1.64 erweitert asynchrone Programmierung mit IntoFuture
[video] Rust & Wasm (Safe and fast web development)
[video] Crust of Rust: Build Scripts and Foreign-Function Interfaces (FFI)
[video] Bevy Basics Reflect
Crate of the Week
This week's crate is serde-transcode, a crate to efficiently convert between various serde-supporting formats
Thanks to Kornel for the suggestion!
Please submit your suggestions and votes for next week!
Call for Participation
Always wanted to contribute to open-source projects but didn't know where to start? Every week we highlight some tasks from the Rust community for you to pick and get started!
Some of these tasks may also have mentors available, visit the task page for more information.
zerocopy - Test more conditions in GitHub actions
pw-sys - help with CI for one of diesel's dependencies
Ockam - Improve CowStr Display
Ockam - https://github.com/build-trust/ockam/issues/3507
Ockam - Refactor NodeManager constructor
If you are a Rust project owner and are looking for contributors, please submit tasks here.
Updates from the Rust Project
347 pull requests were merged in the last week
add armv5te-none-eabi and thumbv5te-none-eabi targets
compiler-builtins: enable floating point intrinsics for RISCV32 microcontrollers
rustc_transmute: fix big-endian discriminants
allow ~const bounds on non-const functions
allow specializing on const trait bounds
recover from struct nested in struct
recover some items that expect braces and don't take semicolons
make cycle errors recoverable
avoid panicking on missing fallback
require #[const_trait] on Trait for impl const Trait
resolve async fn signature even without body (e.g., in trait)
diagnostics: avoid syntactically invalid suggestion in if conditionals
add help for invalid inline argument
suggest Default::default() when binding isn't initialized
improve error for when query is unsupported by crate
improve the help message for an invalid calling convention
look at move place's type when suggesting mutable reborrow
note if mismatched types have a similar name
note the type when unable to drop values in compile time
miri: don't back up past the caller when looking for an FnEntry span
interpret: expose generate_stacktrace without full InterpCx
inline SyntaxContext in both encoded span representation
introduce mir::Unevaluated
only generate closure def id for async fns with body
use function pointers instead of macro-unrolled loops in rustc_query_impl
separate definitions and HIR owners in the type system
use partition_point instead of binary_search when looking up source lines
skip Equate relation in handle_opaque_type
calculate ProjectionTy::trait_def_id for return-position impl Trait in trait correctly
manually cleanup token stream when macro expansion aborts
neither require nor imply lifetime bounds on opaque type for well formedness
normalize closure signature after construction
normalize opaques with bound vars
split out async_fn_in_trait into a separate feature
support overriding initial rustc and cargo paths
use internal iteration in Iterator comparison methods
alloc: add unstable cfg features no_rc and no_sync
a fn pointer doesn't implement Fn/FnMut/FnOnce if its return type isn't sized
fix ConstProp handling of written_only_inside_own_block_locals
implied_bounds: deal with inference vars
make Condvar, Mutex, RwLock const constructors work with the unsupported impl
make projection bounds with const bounds satisfy const
resolve: set effective visibilities for imports more precisely
add option to deduplicate extern blocks
codegen: implement manuallydrop fields better
optimize array::IntoIter
std: use sync::RwLock for internal statics
stabilize const BTree{Map,Set}::new
constify Default impl's for Arrays and Tuples
constify cmp_min_max_by
constify slice.split_at_mut(_unchecked)
add const_closure, constify Try trait
make ManuallyDrop satisfy ~const Destruct
make from_waker, waker and from_raw unstably const
extend const_convert with const {FromResidual, Try} for ControlFlow
recover error strings on Unix from_lossy_utf8
cargo: add support for relative git submodule paths
cargo: improve errors for TOML fields that support workspace inheritance
cargo: report cmd aliasing failure with more contexts
cargo: error trailing args rather than ignore
cargo: forward non-UTF8 arguments to external subcommands
cargo: make unknown features on cargo add more discoverable
rustdoc: stabilize --diagnostic-width
bindgen: handle no_return attributes
bindgen: remove file added by mistake
clippy: add matches! checking to nonstandard_macro_braces
clippy: fix ICE in needless_pass_by_value with unsized dyn Fn
clippy: fix ICE in unnecessary_to_owned
clippy: fix panic when displaying the backtrace of failing integration tests
clippy: moved derive_partial_eq_without_eq to nursery
clippy: never_loop: fix FP with let..else statements
clippy: nonstandard_macro_braces do not modify macro arguments
clippy: new uninlined_format_args lint to inline explicit arguments
clippy: uninit_vec: fix false positive with set_len(0)
rust-analyzer: add assist to unwrap tuple declarations
rust-analyzer: fix diagnostics not working in enum variant bodies
rust-analyzer: fix operator highlighting tags applying too broadly
rust-analyzer: properly set the enum variant body type from the repr attribute
rust-analyzer: properly support IDE functionality in enum variants
rust-analyzer: use the sysroot proc-macro server for analysis-stats
rust-analyzer: display the value of enum variant on hover
rust-analyzer: type inference for generators
Rust Compiler Performance Triage
Overall a fairly quiet week in terms of new changes; the majority of the delta this week was due to reverting #101620, which was a regression noted in last week's report.
Triage done by @simulacrum. Revision range: 8fd6d03e2..d9297d22
2 Regressions, 7 Improvements, 3 Mixed; 3 of them in rollups 53 artifact comparisons made in total
Full report here
Call for Testing
An important step for RFC implementation is for people to experiment with the implementation and give feedback, especially before stabilization. The following RFCs would benefit from user testing before moving forward:
No RFCs issued a call for testing this week.
If you are a feature implementer and would like your RFC to appear on the above list, add the new call-for-testing label to your RFC along with a comment providing testing instructions and/or guidance on which aspect(s) of the feature need testing.
Approved RFCs
Changes to Rust follow the Rust RFC (request for comments) process. These are the RFCs that were approved for implementation this week:
Rust Style Team
Final Comment Period
Every week, the team announces the 'final comment period' for RFCs and key PRs which are reaching a decision. Express your opinions now.
RFCs
No RFCs entered Final Comment Period this week.
Tracking Issues & PRs
[disposition: merge] Allow transmutes between the same types after erasing lifetimes
[disposition: merge] Add AsFd implementations for stdio lock types on WASI.
[disposition: merge] Tracking Issue for asm_sym
New and Updated RFCs
[updated] Update RFC 2906 to match the implementation
[new] RFC: Aligned trait
[new] RFC: Field projection
Upcoming Events
Rusty Events between 2022-09-28 - 2022-10-26 🦀
Virtual
2022-09-28 | Virtual (London, UK) | Rust London User Group
Rust (Hybrid) Hack & Learn September 2022
2022-09-30 | Virtual (Minneapolis, MN, US) | Minneapolis Rust Meetup
Beginner Rust Open "Office Hours"
2022-10-04 | Virtual (Buffalo, NY, US) | Buffalo Rust Meetup
Buffalo Rust User Group, First Tuesdays
2022-10-05 | Virtual (Indianapolis, IN, US) | Indy Rust
Indy.rs - with Social Distancing
2022-10-05 | Virtual (Stuttgart, DE) | Rust Community Stuttgart
Rust-Meetup
2022-10-06 | Virtual (Nürnberg, DE) | Rust Nuremberg
Rust Nürnberg online #18
2022-10-08 | Virtual | Rust GameDev
Rust GameDev Monthly Meetup
2022-10-11 | Virtual (Dallas, TX, US) | Dallas Rust
Second Tuesday
2022-10-12 | Virtual (Boulder, CO, US) | Boulder Elixir and Rust
Monthly Meetup
2022-10-12 | Virtual (Erlangen, DE) | Rust Franken
Rust Franken Meetup #4
2022-10-12 | Virtual (San Francisco, CA, US) | Microsoft Reactor San Francisco
Getting Started with Rust: Building Rust Projects
2022-10-13 | Virtual (Berlin, DE) | EuroRust
EuroRust (Oct 13-14)
2022-10-15 | Virtual (Nürnberg, DE) | Rust Nuremberg
Deep Dive Session 2 (CuteCopter): Reverse Engineering a tiny drone
2022-10-18 | Virtual (Washington, DC, US) | Rust DC
Mid-month Rustful
2022-10-19 | Virtual (Vancouver, BC, CA) | Vancouver Rust
Rust Study/Hack/Hang-out
2022-10-20 | Virtual (Stuttgart, DE) | Rust Community Stuttgart
Rust-Meetup
2022-10-25 | Virtual (Dallas, TX, US) | Dallas Rust
Last Tuesday
Asia
2022-10-11 | Tokyo, JP | Tokyo Rust Meetup
Cost-Efficient Rust in Practice
Europe
2022-09-28 | London, UK + Virtual | Rust London User Group
Rust (Hybrid) Hack & Learn September 2022
2022-09-29 | Amsterdam, NL | Rust Developers Amsterdam Group
Fiberplane Rust Workshop
2022-09-29 | Copenhagen, DK | Copenhagen Rust group
Rust Hack Night #29
2022-09-29 | Enschede, NL | Dutch Rust Meetup
Going full stack on Rust
2022-09-30 | Berlin, DE | RustFi Hackathon
RustFi Hackathon 30 Sept - 2 Oct
2022-10-02 | Florence, IT + Virtual | RustLab
RustLab Conference 2022 (Oct 2-4)
2022-10-03 | Stockholm, SE | Stockholm Rust
Rust Meetup @Microsoft Reactor
2022-10-04 | Helsinki, FI | Finland Rust Meetup
October meetup
2022-10-06 | Wrocław, PL | Rust Wrocław
Rust Wrocław Meetup #29
2022-10-12 | Berlin, DE | Rust Berlin
Rust and Tell - EuroRust B-Sides
2022-10-13 | Berlin, DE + Virtual | EuroRust
EuroRust (Oct 13-14)
2022-10-18 | Paris, FR | Rust Paris
Rust Paris meetup #53
North America
2022-09-28 | Austin, TX, US | Rust ATX
Rust Lunch
2022-09-29 | Ciudad de México, MX | Rust MX
Zola o como la comunidad de RustMX tiene página
2022-10-13 | Columbus, OH, US | Columbus Rust Society
Monthly Meeting
2022-10-18 | San Francisco, CA, US | San Francisco Rust Study Group
Rust Hacking in Person
2022-10-20 | New York, NY, US | Rust NYC
Anyhow ? Turbofish ::<> / HTTP calls and errors in Rust.
2022-10-25 | Toronto, ON, CA | Rust Toronto
Rust DHCP
Oceania
2022-10-10 | Sydney, NSW, AU | Rust Sydney
Rust Lightning Talks
2022-10-20 | Wellington, NZ + Virtual | Rust Wellington
Tune Up Edition: software engineering management
If you are running a Rust event please add it to the calendar to get it mentioned here. Please remember to add a link to the event too. Email the Rust Community Team for access.
Jobs
Please see the latest Who's Hiring thread on r/rust
Quote of the Week
Semver has its philosophy, but a pragmatic approach to versioning is:
<upgrades may break API> . <downgrades may break API> . <fine either way>
– Kornel on rust-users
Thanks to Artem Borisovskiy for the suggestion!
Please submit quotes and vote for next week!
This Week in Rust is edited by: nellshamrell, llogiq, cdmistman, ericseppanen, extrawurst, andrewpollack, U007D, kolharsam, joelmarcey, mariannegoldin, bennyvasquez.
Email list hosting is sponsored by The Rust Foundation
Discuss on r/rust
0 notes
Text
What exactly is GraphQL?
GraphQL is a new API standard was invented and developed by Facebook. GraphQL is intended to improve the responsiveness, adaptability, and developer friendliness of APIs. It was created to optimize RESTful API calls and offers a more flexible, robust, and efficient alternative to REST. It is an open-source server-side technology that is now maintained by a large global community of companies and individuals. It is also an execution engine that acts as a data query language, allowing you to fetch and update data declaratively. GraphQL makes it possible to transfer data from the server to the client. It allows programmers to specify the types of requests they want to make.
GraphQL servers are available in a variety of languages, including Java, Python, C#, PHP, and others. As a result, it is compatible with any programming language and framework.
For a better understanding, the client-server architecture of GraphQL is depicted above
No JSON is used to write the GraphQL query. A GraphQL query is transmitted as a string to the server then when a client sends a 'POST' request to do so.
The query string is received by the server and extracted. The server then processes and verifies the GraphQL query in accordance with the graph data model and GraphQL syntax (GraphQL schema).
The GraphQL API server receives the data requested by the client by making calls to a database or other services, much like the other API servers do.
The data is then taken by the server and returned to the client as a JSON object.
Here are some major GraphQL characteristics:
Declarative query language, not imperative, is offered.
It is hierarchical and focused on the product.
GraphQL has excellent type checking. It denotes that inquiries are carried out inside the framework of a specific system.
GraphQL queries are encoded in the client rather than the server.
It has all the attributes of the OSI model's application layer.
GraphQL has three essential parts:
Query
Resolver
Schema
1. Query: The client machine application submitted the Query as an API request. It can point to arrays and support augments. To read or fetch values, use a query. There are two key components to a query:
a) Field: A field merely signifies that we are requesting a specific piece of information from the server. The field in a graphQL query is demonstrated in the example below. query { employee { empId ename } } "data": { "employee”: [ { "empId": 1, "ename": "Ashok" }, { "id": "2", "firstName": "Fred" } …] } }
In the above In the GraphQL example above, we query the server for the employee field along with its subfields, empId and ename. The data we requested is returned by the GraphQL server.
b) Arguments: As URL segments and query parameters, we can only pass a single set of arguments in REST. A typical REST call to obtain a specific profile will resemble the following: GET /api'employee?id=2 Content-Type: application JSON { "empId": 3, "ename": "Peter." }
2. Resolver: Resolvers give instructions on how to translate GraphQL operations into data. They define resolver routines that convert the query to data.
It shows the server the location and method for fetching data for a certain field. Additionally, the resolver distinguishes between API and database schema. The separated information aids in the modification of the database-generated material.
3. Schema: The heart of GraphQL implementation is a schema. It explains the features that the clients connected to it can use.
The benefits of using GraphQL in an application are summarized below.
It is more precise, accurate, and efficient.
GraphQL queries are simple and easy to understand.
Because it uses a simple query, GraphQL is best suited for microservices and complex systems.
It makes it easier to work with large databases.
Data can be retrieved with a single API call.
GraphQL does not have over-fetching or under-fetching issues.
GraphQL can be used to discover the schema in the appropriate format.
GraphQL provides extensive and powerful developer tools for query testing and documentation.
GraphQL automatically updates documentation in response to API changes.
GraphQL fields are used in multiple queries that can be shared and reused at a higher component level.
You have control over which functions are exposed and how they operate.
It is suitable for rapid application prototyping.
GraphQL can be used in all types of mobile and web applications across industries, verticals, and categories that require data from multiple sources, real-time data updates, and offline capabilities. Here is some application that benefits greatly from GraphQL development:
It offers Relay as well as other client frameworks.
GraphQL assists you in improving the performance of your mobile app.
It can reduce the problem of over fetching to reduce server-side cloud service and client-side network usage.
It can be used when the client application needs to specify which fields in a long query format are required.
GraphQL can be fully utilized when adding functionality to an existing or old API.
It is used to simplify complicated APIs.
The mix-and-match façade pattern, which is popular in object-oriented programming.
When you need to combine data from multiple sources into a single API.
GraphQL can be used as an abstraction on an existing API to specify response structure based on user requirements.
In this blog, I’ve attempted to explain the significance of GraphQL it is a new technology that allows developers to create scalable APIs that are not constrained by the limitations of REST APIs. It allows developers to use an API to easily describe, define, and request specific data. Please let us know what you think of GraphQL. Do you have any further questions? Please do not hesitate to contact us. We will gladly assist you.
0 notes
Text
GraphQL Vs REST: Which One’s Best for API Development?

GraphQL is referred to as the revolutionary choice for API design and development. It presents a modern approach over the traditional REST approach for data sending and retrieval over HTTP. Since the REST has been here for a long time now, it has a high rate of adoption while GraphQL is a better alternative that overcomes the shortcomings of REST.
The argument which one is best for API development is getting intense as the users of both technologies are participating in this raging war. It has left businesses confused about which API design, development, and deployment is better suited for them. The team at ashutec sheds light on which API development technology is best to help businesses make a better decision for their project. But first, let’s understand what an API is.
What is an API?
Application Programming Interface or API is a group of protocols to aid in data sending and retrieval in an easy manner. It simplifies the communication between two systems of an app and helps them talk to each other.
REST and GraphQL both are prominent technologies behind API design and development. Both the technologies resolve the same problem but with a different approach. Here are some criteria to choose the best technology for your API development projects.
1. Community Popularity
2. Performance
3. Security
4. Data Fetching
Read the rest of the article on the best API development technology out of GraphQL and REST to get a better perspective to consider the best technology.
0 notes
Text
July 26, 2018
News and Links
Protocol (with an assist from the Ethereum Research team)
Shasper chain, v2.1
Prysmatic’s biweekly update on transitioning to Eth 2.0 with separate Go codebase
VDFs are not Proof of Work by Danny Ryan. Verifiable Delay Functions have some properties - requiring significant computation to calculate but relatively little computation to verify - that is suitable for strengthening RANDAO-based RNG. That sounds like proof of work, but Danny explains the difference between VDFs and PoW.
STARKs, Part 3: Into the Weeds by Vitalik Buterin: In Vitalik’s STARKs series part 3, he introduced how to actually implement a STARK with vivid explication.
Latest Casper standup call
VB: Epoch-less Casper FFG liveness/safety argument
Why Shasper makes more sense than the previous FFG, then sharding roadmap
LearnPlasma is really coming together as a Plasma education resource
A Plasma Cash primer from Simon de la Rouviere
Jinglan Wang: what is Plasma? Plasma Cash?
Raiden is live on Ropsten testnet and open to testing
Stuff for developers
Benchmarking between Mythril, Manticore and Oyente from ConsenSys Diligence
What FoMo3d’s real exit scam might look like, but you can hedge with Augur?
Péter Szilágyi: How to PWN FoMo3D, a beginners guide
Pipeline - video explaining PoC of visual IDE of already deployed functions
Airswap tutorial on building with their API server
Adding ENS into your dapp tutorial
Tutorial to using Parity’s Secret Store multi-party key generation
IDEO on dealing with gas in UX
ethereum-to-graphql: autogenerate the schema and resolver
EthQL alpha from PegaSys and Infura
Aragon Package Manager - upgradeability for Aragon orgs
Zeppelin: Exploring upgradeability governance in ZeppelinOS with a Gnosis MultiSig
Apache Camel connector for Ethereum enterprise using web3j
The new Infura dashboard - existing access tokens need to migrate to v3 authentication keys and endpoints
Release
Trinity v0.1.0-alpha.12, better syncing and performance. Also has a new website.
web3j v3.5
web3.js 0.20.7 and web3.js 1.0.0-beta.35. breaking change on http provider
EthereumJS VM v2.4.0 (and their monthly recap)
Live on mainnet
iExec went live on mainnet to test rendering. 80% of jobs completed.
Melonport is live on mainnet with somewhat constrained Paros release
Gnosis DutchX contracts are live on mainnet in advance of their 100k competition to build on them
Ecosystem
The new Gnosis Safe miltisig is live on Rinkeby
Parity’s Thibaut Sardan: what is a light client and why should you care?
Someone managed to briefly cause a kerfuffle with a 1337 Javascript popup in Etherscan using their Disqus comments.
Nathan Sexer: State of stablecoins
Metamask’s retrospective on getting removed from the Chrome store this week. Also how they’ll support more networks
A reader friendly version of 100+ Eth dev interviews from EthPrize
Governance and Standards
EIP1227 (remove difficulty bomb, revert to 5 ETH block reward) vs EIP1234 (delay difficulty bomb, reduce to 2 ETH block reward) vs EIP1240 (remove difficulty bomb, leave at 3 ETH block reward). Results in Afri’s poll mirror what I hear in the community.
ERC1257: proof of payment standard
ERC1238: non-transferrable token badges
ERC1261: membership verification token
Add bottom-up composables to ERC998
ERC1263: NFT index
Project Updates
As planned, Augur burned the escape hatch, so the code is now decentralized.
Messari buys OnchainFX, lays out content strategy
Status now displays at full resolution on tablets, and no more Mixpanel
Maker to vote on increasing the Dai stability fee to 2.5%
Interviews, Podcasts, Videos, Talks
Dappcon videos are coming in
Andy Tudhope talks about EthPrize’s dev interviews on Smartest Contract
CoinTelegraph with some good print interviews: Jutta Steiner and Joe Lubin
FunFair’s Jez San podcast interview
Open Source Web3 Design call
Jay Rush talking The Dao and how Quickblocks grew out of that from Gitcoin’s weekly stream
Dan Boneh on the Bitcoin Podcast
Ethan Buchman talks testnets on Zero Knowledge
Dan Finlay on MetaMask and Mustekala on Smartest Contract
Maker’s Rune Christensen print interview where he says they are developing their own language for better security
Martin Becze on Epicenter
Tokens
You now need Santiment tokens to access some of their market and data feeds.
Text tutorial of how to claim your (free) Livepeer tokens.
Incentivizing new users of TCRs through gamification
Mike Maples: Slow money crypto
General
Zilliqa releases its Scilla language “with formalization of its semantics and its embedding into Coq.” Also of interest, Etheremon is planning to have gameplay on Zilliqa but will use Ethereum as its store of value.
First Polkadot parachain deployed in PoC2
Raul Jordan with an intro to hashing algos
NYTimes on art and blockchain
Péter Szilágyi: TOR from within GO. I imagine many who read it will immediately start using the Brave browser’s private tabs with TOR
Ethereum coming to Google Cloud
John Backus with his lessons learned from p2p file sharing
Dates of Note
Upcoming dates of note:
August 7 - Start of two month distributed hackathon from Giveth, Aragon, Swarm City and Chainshot
August 10-12 - EthIndia hackathon (Bangalore)
August 10-12 - ENS workshop and hackathon (London)
August 22 - Maker DAO ‘Foundation Proposal’ vote
August 24-26 - Loom hackathon (Oslo, Norway)
September 6 - Security unconference (Berlin)
September 7-9 - EthBerlin hackathon
September 7-9 - WyoHackathon (Wyoming)
September 8 - Ethereum Industry Summit (Hong Kong)
Oct 5-7 - TruffleCon in Portland
Oct 5-7 - EthSanFrancisco hackathon
Oct 11 - Crypto Economics Security Conf (Berkeley)
Oct 22-24 - Web3Summit (Berlin)
Oct 26-28 - Status hackathon (Prague)
Oct 29 - Decentralized Insurance D1Conf (Prague)
Oct 30 - Nov 2 - Devcon4 (Prague)
Dec 7-9 - dGov distributed governance conf (Athens)
December - EthSingapore hackathon
If you appreciate this newsletter, thank ConsenSys
This newsletter is made possible by ConsenSys, which is perpetually hiring if you’re interested.

Editorial control is 100% me. If you're unhappy with editorial decisions, feel free to tweet at me.
Shameless self-promotion
Link: http://www.weekinethereum.com/post/176336020338/july-26-2018
Most of what I link to I tweet first: @evan_van_ness
Did someone forward this email to you? Sign up to receive the weekly email (box in the top blue header)
1 note
·
View note
Photo

Building a Habit Tracker with Prisma, Chakra UI, and React
In June 2019, Prisma 2 Preview was released. Prisma 1 changed the way we interact with databases. We could access databases through plain JavaScript methods and objects without having to write the query in the database language itself. Prisma 1 acted as an abstraction in front of the database so it was easier to make CRUD (create, read, update and delete) applications.
Prisma 1 architecture looked like this:
Notice that there’s an additional Prisma server required for the back end to access the database. The latest version doesn’t require an additional server. It's called The Prisma Framework (formerly known as Prisma 2) which is a complete rewrite of Prisma. The original Prisma was written in Scala, so it had to be run through JVM and needed an additional server to run. It also had memory issues.
The Prisma Framework is written in Rust so the memory footprint is low. Also, the additional server required while using Prisma 1 is now bundled with the back end, so you can use it just like a library.
The Prisma Framework consists of three standalone tools:
Photon: a type-safe and auto-generated database client ("ORM replacement")
Lift: a declarative migration system with custom workflows
Studio: a database IDE that provides an Admin UI to support various database workflows.
Photon is a type-safe database client that replaces traditional ORMs, and Lift allows us to create data models declaratively and perform database migrations. Studio allows us to perform database operations through a beautiful Admin UI.
Why use Prisma?
Prisma removes the complexity of writing complex database queries and simplifies database access in the application. By using Prisma, you can change the underlying databases without having to change each and every query. It just works. Currently, it only supports mySQL, SQLite and PostgreSQL.
Prisma provides type-safe database access provided by an auto-generated Prisma client. It has a simple and powerful API for working with relational data and transactions. It allows visual data management with Prisma Studio.
Providing end-to-end type-safety means developers can have confidence in their code, thanks to static analysis and compile-time error checks. The developer experience increases drastically when having clearly defined data types. Type definitions are the foundation for IDE features — like intelligent auto-completion or jump-to-definition.
Prisma unifies access to multiple databases at once (coming soon) and therefore drastically reduces complexity in cross-database workflows (coming soon).
It provides automatic database migrations (optional) through Lift, based on a declarative datamodel expressed using GraphQL's schema definition language (SDL).
Prerequisites
For this tutorial, you need a basic knowledge of React. You also need to understand React Hooks.
Since this tutorial is primarily focused on Prisma, it’s assumed that you already have a working knowledge of React and its basic concepts.
If you don’t have a working knowledge of the above content, don't worry. There are tons of tutorials available that will prepare you for following this post.
Throughout the course of this tutorial, we’ll be using yarn. If you don’t have yarn already installed, install it from here.
To make sure we’re on the same page, these are the versions used in this tutorial:
Node v12.11.1
npm v6.11.3
npx v6.11.3
yarn v1.19.1
prisma2 v2.0.0-preview016.2
react v16.11.0
Folder Structure
Our folder structure will be as follows:
streaks-app/ client/ server/
The client/ folder will be bootstrapped from create-react-app while the server/ folder will be bootstrapped from prisma2 CLI.
So you just need to create a root folder called streaks-app/ and the subfolders will be generated while scaffolding it with the respective CLIs. Go ahead and create the streaks-app/ folder and cd into it as follows:
$ mkdir streaks-app && cd $_
The Back End (Server Side)
Bootstrap a new Prisma 2 project
You can bootstrap a new Prisma 2 project by using the npx command as follows:
$ npx prisma2 init server
Alternatively, you can install prisma2 CLI globally and run the init command. The do the following:
$ yarn global add prisma2 // or npm install --global prisma2 $ prisma2 init server
Run the interactive prisma2 init flow & select boilerplate
Select the following in the interactive prompts:
Select Starter Kit
Select JavaScript
Select GraphQL API
Select SQLite
Once terminated, the init command will have created an initial project setup in the server/ folder.
Now open the schema.prisma file and replace it with the following:
generator photon { provider = "photonjs" } datasource db { provider = "sqlite" url = "file:dev.db" } model Habit { id String @default(cuid()) @id name String @unique streak Int }
schema.prisma contains the data model as well as the configuration options.
Here, we specify that we want to connect to the SQLite datasource called dev.db as well as target code generators like photonjs generator.
Then we define the data model Habit, which consists of id, name and streak.
id is a primary key of type String with a default value of cuid().
name is of type String, but with a constraint that it must be unique.
streak is of type Int.
The seed.js file should look like this:
const { Photon } = require('@generated/photon') const photon = new Photon() async function main() { const workout = await photon.habits.create({ data: { name: 'Workout', streak: 49, }, }) const running = await photon.habits.create({ data: { name: 'Running', streak: 245, }, }) const cycling = await photon.habits.create({ data: { name: 'Cycling', streak: 77, }, }) const meditation = await photon.habits.create({ data: { name: 'Meditation', streak: 60, }, }) console.log({ workout, running, cycling, meditation, }) } main() .catch(e => console.error(e)) .finally(async () => { await photon.disconnect() })
This file creates all kinds of new habits and adds it to the SQLite database.
Now go inside the src/index.js file and remove its contents. We'll start adding content from scratch.
First go ahead and import the necessary packages and declare some constants:
const { GraphQLServer } = require('graphql-yoga') const { makeSchema, objectType, queryType, mutationType, idArg, stringArg, } = require('nexus') const { Photon } = require('@generated/photon') const { nexusPrismaPlugin } = require('nexus-prisma')
Now let’s declare our Habit model just below it:
const Habit = objectType({ name: 'Habit', definition(t) { t.model.id() t.model.name() t.model.streak() }, })
We make use of objectType from the nexus package to declare Habit.
The name parameter should be the same as defined in the schema.prisma file.
The definition function lets you expose a particular set of fields wherever Habit is referenced. Here, we expose id, name and streak field.
If we expose only the id and name fields, only those two will get exposed wherever Habit is referenced.
Below that, paste the Query constant:
const Query = queryType({ definition(t) { t.crud.habit() t.crud.habits() // t.list.field('habits', { // type: 'Habit', // resolve: (_, _args, ctx) => { // return ctx.photon.habits.findMany() // }, // }) }, })
We make use of queryType from the nexus package to declare Query.
The Photon generator generates an API that exposes CRUD functions on the Habit model. This is what allows us to expose t.crud.habit() and t.crud.habits() method.
t.crud.habit() allows us to query any individual habit by its id or by its name. t.crud.habits() simply returns all the habits.
Alternatively, t.crud.habits() can also be written as:
t.list.field('habits', { type: 'Habit', resolve: (_, _args, ctx) => { return ctx.photon.habits.findMany() }, })
Both the above code and t.crud.habits() will give the same results.
In the above code, we make a field named habits. The return type is Habit. We then call ctx.photon.habits.findMany() to get all the habits from our SQLite database.
Note that the name of the habits property is auto-generated using the pluralize package. It's therefore recommended practice to name our models singular — that is, Habit and not Habits.
We use the findMany method on habits, which returns a list of objects. We find all the habits as we have mentioned no condition inside of findMany. You can learn more about how to add conditions inside of findMany here.
Below Query, paste Mutation as follows:
const Mutation = mutationType({ definition(t) { t.crud.createOneHabit({ alias: 'createHabit' }) t.crud.deleteOneHabit({ alias: 'deleteHabit' }) t.field('incrementStreak', { type: 'Habit', args: { name: stringArg(), }, resolve: async (_, { name }, ctx) => { const habit = await ctx.photon.habits.findOne({ where: { name, }, }) return ctx.photon.habits.update({ data: { streak: habit.streak + 1, }, where: { name, }, }) }, }) }, })
Mutation uses mutationType from the nexus package.
The CRUD API here exposes createOneHabit and deleteOneHabit.
createOneHabit, as the name suggests, creates a habit whereas deleteOneHabit deletes a habit.
createOneHabit is aliased as createHabit, so while calling the mutation we call createHabit rather than calling createOneHabit.
Similarly, we call deleteHabit instead of deleteOneHabit.
Finally, we create a field named incrementStreak, which increments the streak of a habit. The return type is Habit. It takes an argument name as specified in the args field of type String. This argument is received in the resolve function as the second argument. We find the habit by calling ctx.photon.habits.findOne() while passing in the name parameter in the where clause. We need this to get our current streak. Then finally we update the habit by incrementing the streak by 1.
Below Mutation, paste the following:
const photon = new Photon() new GraphQLServer({ schema: makeSchema({ types: [Query, Mutation, Habit], plugins: [nexusPrismaPlugin()], }), context: { photon }, }).start(() => console.log( `🚀 Server ready at: http://localhost:4000\n⭐️ See sample queries: http://pris.ly/e/js/graphql#5-using-the-graphql-api`, ), ) module.exports = { Habit }
We use the makeSchema method from the nexus package to combine our model Habit, and add Query and Mutation to the types array. We also add nexusPrismaPlugin to our plugins array. Finally, we start our server at localhost:4000. Port 4000 is the default port for graphql-yoga. You can change the port as suggested here.
Let's start the server now. But first, we need to make sure our latest schema changes are written to the node_modules/@generated/photon directory. This happens when you run prisma2 generate.
If you haven't installed prisma2 globally, you'll have to replace prisma2 generate with ./node_modules/.bin/prisma2 generate. Then we need to migrate our database to create tables.
The post Building a Habit Tracker with Prisma, Chakra UI, and React appeared first on SitePoint.
by Akshay Kadam via SitePoint https://ift.tt/2YaQ5v2
0 notes
Link
One of the most important things which is also often neglected by developers - the performance. One of the key focus area for the 1.0 release was making it blazingly fast ⚡
TypeGraphQL is basically an abstraction layer built on top of the reference GraphQL implementation for JavaScript - graphql-js. To measure the overhead of the abstraction, a few demo examples were made to compare it against the "bare metal" - using raw graphql-js library.
It turned out that in the most demanding cases like returning an array of 25 000 nested objects, the old version 0.17 was even about 5 times slower!
library execution time TypeGraphQL v0.17 1253.28 ms graphql-js 265.52 ms
After profiling the code and finding all the root causes (like always using async execution path), the overhead was reduced from 500% to just 17% in v1.0.0! By using simpleResolvers it can be reduced even further, up to 13%:
execution time graphql-js 265.52 ms TypeGraphQL v1.0 310.36 ms with "simpleResolvers" 299.61 ms with a global middleware 1267.82 ms
Such small overhead is much easier to accept than the initial 500%! More info about how to enable the performance optimizations in the more complex cases can be found in the docs 📖.
Schema isolation
This is another feature that is not visible from the first sight but gives new possibilities like splitting the schema to public and private ones 👀
In 0.17.x and before, the schema was built from all the metadata collected by evaluating the TypeGraphQL decorators. The drawback of this approach was the schema leaks - every subsequent calls of buildSchema was returning the same schema which was combined from all the types and resolvers that could be find in the metadata storage.
In TypeGraphQL 1.0 it's no longer true! The schemas are now isolated which means that the buildSchema call takes theresolvers array from options and emit only the queries, mutation and types that are related to those resolvers.
const firstSchema = await buildSchema({ resolvers: [FirstResolver], }); const secondSchema = await buildSchema({ resolvers: [SecondResolver], });
So just by modifying the resolvers option we can have different sets of operations exposed in the GraphQL schemas! Proper isolation also makes serverless development easier as it allows to get rid of the "Schema must contain uniquely named types" errors and others.
Directives and extensions
This two new features are two complementary ways to put some metadata about the schema items.
GraphQL directives though the syntax might remind the TS decorators, as "a directive is an identifier preceded by a @ character", but in fact, they are a purely Schema Definition Language feature. Apart from the metadata capabilities, they can also modify the schema and e.g. generate the connection type for pagination purposes. Basically, the looks like this:
type Query { foobar: String! @auth(requires: USER) }
To apply them, we just need to put the @Directive decorator above and supply the string argument, e.g.:
@Resolver() class FooBarResolver { @Directive("@auth(requires: USER)") @Query() foobar(): string { return "foobar"; } }
However, on the other side we have the GraphQL extensions which are the JS way to achieve the same goal. It's the recommended way of putting the metadata about the types when applying some custom logic.
To declare the extensions for type or selected field, we need to use @Extensionsdecorator, e.g.:
@ObjectType() class Foo { @Extensions({ roles: [Role.User] }) @Field() bar: string; }
We can then read that metadata in the resolvers or middlewares, just by exploring the GraphQLResolveInfo object, e.g.:
export const ExtensionsMiddleware: MiddlewareFn = async ({ info }, next) => { const { extensions } = info.parentType.getFields()[info.fieldName]; console.log(extensions?.roles); // log the metadata return next(); };
More info about directives and extensions features can be found in docs 📖
Resolvers and arguments for interface fields
The last thing that was preventing TypeGraphQL from being fully GraphQL compliant thus blocking the 1.0 release - an ability to provide interface fields resolvers implementations and declare its arguments.
Basically, we can define resolvers for the interface fields using the same syntax we would use in case of the @ObjectType, e.g.:
@InterfaceType() abstract class IPerson { @Field() avatar(@Arg("size") size: number): string { return `http://i.pravatar.cc/${size}`; } }
...with only a few exceptions for cases like abstract methods and inheritance, which you can read about in the docs.
More descriptive errors messages
One of the most irritating issues for newcomers were the laconic error messages that haven't provided enough info to easily find the mistakes in the code.
Messages like "Cannot determine GraphQL input type for users" or even the a generic "Generating schema error" were clearly not helpful enough while searching for the place where the flaws were located.
Now, when the error occurs, it is broadly explained, why it happened and what could we do to fix that, e.g.:
Unable to infer GraphQL type from TypeScript reflection system. You need to provide explicit type for argument named 'filter' of 'getUsers' of 'UserResolver' class.
or:
Some errors occurred while generating GraphQL schema: Interface field 'IUser.accountBalance' expects type 'String!' but 'Student.accountBalance' is of type 'Float'
That should allow developers to safe tons of time and really speed up the development 🏎
Transforming nested inputs and arrays
In the previous releases, an instance of the input type class was created only on the first level of inputs nesting. So, in cases like this:
@InputType() class SampleInput { @Field() sampleStringField: string; @Field() nestedField: SomeNestedInput; } @Resolver() class SampleResolver { @Query() sampleQuery(@Arg("input") input: SampleInput): boolean { return input.nestedField instanceof SomeNestedInput; } }
the nestedField property of input was just a plain Object, not an instance of the SomeNestedInput class. That behavior was producing some unwanted issues, including limited support for inputs and args validation.
Since 1.0 release, it's no longer an issue and all the nested args and inputs are properly transformed to the corresponding input type classes instances, even including deeply nested arrays
0 notes
Text
Understanding Client-Side GraphQl With Apollo-Client In React Apps
About The Author
Blessing Krofegha is a Software Engineer Based in Lagos Nigeria, with a burning desire to contribute to making the web awesome for all, by writing and building … More about Blessing …
Ever tried interacting with a GraphQL server in a client-side application and felt like giving up even before getting anywhere? Ever declined an invitation to join a code base that requires working with GraphQL API because you had no idea? Ever felt like the only front-end engineer who hasn’t learned how to consume GraphQL APIs? If you answered yes to any of these questions, then this tutorial is for you. We’ll be taking a closer look at a few basics of GraphQL and Apollo Client, as well as how to work with both of them. By the end, we’ll have built a pet shop app that uses Apollo Client. Then, you can go on to build your next project.
According to State of JavaScript 2019, 38.7% of developers would like to use GraphQL, while 50.8% of developers would like to learn GraphQL.
Being a query language, GraphQL simplifies the workflow of building a client application. It removes the complexity of managing API endpoints in client-side apps because it exposes a single HTTP endpoint to fetch the required data. Hence, it eliminates overfetching and underfetching of data, as in the case of REST.
But GraphQL is just a query language. In order to use it easily, we need a platform that does the heavy lifting for us. One such platform is Apollo.
The Apollo platform is an implementation of GraphQL that transfers data between the cloud (the server) to the UI of your app. When you use Apollo Client, all of the logic for retrieving data, tracking, loading, and updating the UI is encapsulated by the useQuery hook (as in the case of React). Hence, data fetching is declarative. It also has zero-configuration caching. Just by setting up Apollo Client in your app, you get an intelligent cache out of the box, with no additional configuration required.
Apollo Client is also interoperable with other frameworks, such as Angular, Vue.js, and React.
Note: This tutorial will benefit those who have worked with RESTful or other forms of APIs in the past on the client-side and want to see whether GraphQL is worth taking a shot at. This means you should have worked with an API before; only then will you be able to understand how beneficial GraphQL could be to you. While we will be covering a few basics of GraphQL and Apollo Client, a good knowledge of JavaScript and React Hooks will come in handy.
GraphQL Basics
This article isn’t a complete introduction to GraphQL, but we will define a few conventions before continuing.
What Is GraphQL?
GraphQL is a specification that describes a declarative query language that your clients can use to ask an API for the exact data they want. This is achieved by creating a strong type schema for your API, with ultimate flexibility. It also ensures that the API resolves data and that client queries are validated against a schema. This definition means that GraphQL contains some specifications that make it a declarative query language, with an API that is statically typed (built around Typescript) and making it possible for the client to leverage those type systems to ask the API for the exact data it wants.
So, if we created some types with some fields in them, then, from the client-side, we could say, “Give us this data with these exact fields”. Then the API will respond with that exact shape, just as if we were using a type system in a strongly typed language. You can learn more in my Typescript article.
Let’s look at some conventions of GraphQl that will help us as we continue.
The Basics
Operations In GraphQL, every action performed is called an operation. There are a few operations, namely:
Query This operation is concerned with fetching data from the server. You could also call it a read-only fetch.
Mutation This operation involves creating, updating, and deleting data from a server. It is popularly called a CUD (create, update, and delete) operation.
Subscriptions This operation in GraphQL involves sending data from a server to its clients when specific events take place. They are usually implemented with WebSockets.
In this article, we will be dealing only with query and mutation operations.
Operation names There are unique names for your client-side query and mutation operations.
Variables and arguments Operations can define arguments, very much like a function in most programming languages. Those variables can then be passed to query or mutation calls inside the operation as arguments. Variables are expected to be given at runtime during the execution of an operation from your client.
Aliasing This is a convention in client-side GraphQL that involves renaming verbose or vague field names with simple and readable field names for the UI. Aliasing is necessary in use cases where you don’t want to have conflicting field names.
GraphQL basic conventions. (Large preview)
What Is Client-Side GraphQL?
When a front-end engineer builds UI components using any framework, like Vue.js or (in our case) React, those components are modeled and designed from a certain pattern on the client to suit the data that will be fetched from the server.
One of the most common problems with RESTful APIs is overfetching and underfetching. This happens because the only way for a client to download data is by hitting endpoints that return fixed data structures. Overfetching in this context means that a client downloads more information than is required by the app.
In GraphQL, on the other hand, you’d simply send a single query to the GraphQL server that includes the required data. The server would then respond with a JSON object of the exact data you’ve requested — hence, no overfetching. Sebastian Eschweiler explains the differences between RESTful APIs and GraphQL.
Client-side GraphQL is a client-side infrastructure that interfaces with data from a GraphQL server to perform the following functions:
It manages data by sending queries and mutating data without you having to construct HTTP requests all by yourself. You can spend less time plumbing data and more time building the actual application.
It manages the complexity of a cache for you. So, you can store and retrieve the data fetched from the server, without any third-party interference, and easily avoid refetching duplicate resources. Thus, it identifies when two resources are the same, which is great for a complex app.
It keeps your UI consistent with Optimistic UI, a convention that simulates the results of a mutation (i.e. the created data) and updates the UI even before receiving a response from the server. Once the response is received from the server, the optimistic result is thrown away and replaced with the actual result.
For further information about client-side GraphQL, spare an hour with the cocreator of GraphQL and other cool folks on GraphQL Radio.
What Is Apollo Client?
Apollo Client is an interoperable, ultra-flexible, community-driven GraphQL client for JavaScript and native platforms. Its impressive features include a robust state-management tool (Apollo Link), a zero-config caching system, a declarative approach to fetching data, easy-to-implement pagination, and the Optimistic UI for your client-side application.
Apollo Client stores not only the state from the data fetched from the server, but also the state that it has created locally on your client; hence, it manages state for both API data and local data.
It’s also important to note that you can use Apollo Client alongside other state-management tools, like RedUX, without conflict. Plus, it’s possible to migrate your state management from, say, Redux to Apollo Client (which is beyond the scope of this article). Ultimately, the main purpose of Apollo Client is to enable engineers to query data in an API seamlessly.
Features of Apollo Client
Apollo Client has won over so many engineers and companies because of its extremely helpful features that make building modern robust applications a breeze. The following features come baked in:
Caching Apollo Client supports caching on the fly.
Optimistic UI Apollo Client has cool support for the Optimistic UI. It involves temporarily displaying the final state of an operation (mutation) while the operation is in progress. Once the operation is complete, the real data replaces the optimistic data.
Pagination Apollo Client has built-in functionality that makes it quite easy to implement pagination in your application. It takes care of most of the technical headaches of fetching a list of data, either in patches or at once, using the fetchMore function, which comes with the useQuery hook.
In this article, we will look at a selection of these features.
Enough of the theory. Tighten your seat belt and grab a cup of coffee to go with your pancakes, as we get our hands dirty.
Building Our Web App
This project is inspired by Scott Moss.
We will be building a simple pet shop web app, whose features include:
fetching our pets from the server-side;
creating a pet (which involves creating the name, type of pet, and image);
using the Optimistic UI;
using pagination to segment our data.
To begin, clone the repository, ensuring that the starter branch is what you’ve cloned.
Getting Started
Install the Apollo Client Developer Tools extension for Chrome.
Using the command-line interface (CLI), navigate to the directory of the cloned repository, and run the command to get all dependencies: npm install.
Run the command npm run app to start the app.
While still in the root folder, run the command npm run server. This will start our back-end server for us, which we’ll use as we proceed.
The app should open up in a configured port. Mine is http://localhost:1234/; yours is probably something else.
If everything worked well, your app should look like this:
Cloned starter branch UI. (Large preview)
You’ll notice that we’ve got no pets to display. That’s because we haven’t created such functionality yet.
If you’ve installed Apollo Client Developer Tools correctly, open up the developer tools and click on the tray icon. You’ll see “Apollo” and something like this:
Apollo Client Developer Tools. (Large preview)
Like the RedUX and React developer tools, we will be using Apollo Client Developer Tools to write and test our queries and mutations. The extension comes with the GraphQL Playground.
Fetching Pets
Let’s add the functionality that fetches pets. Move over to client/src/client.js. We’ll be writing Apollo Client, linking it to an API, exporting it as a default client, and writing a new query.
Copy the following code and paste it in client.js:
import { ApolloClient } from 'apollo-client' import { InMemoryCache } from 'apollo-cache-inmemory' import { HttpLink } from 'apollo-link-http' const link = new HttpLink({ uri: 'https://localhost:4000/' }) const cache = new InMemoryCache() const client = new ApolloClient({ link, cache }) export default client
Here’s an explanation of what is happening above:
ApolloClient This will be the function that wraps our app and, thus, interfaces with the HTTP, caches the data, and updates the UI.
InMemoryCache This is the normalized data store in Apollo Client that helps with manipulating the cache in our application.
HttpLink This is a standard network interface for modifying the control flow of GraphQL requests and fetching GraphQL results. It acts as middleware, fetching results from the GraphQL server each time the link is fired. Plus, it’s a good substitute for other options, like Axios and window.fetch.
We declare a link variable that is assigned to an instance of HttpLink. It takes a uri property and a value to our server, which is https://localhost:4000/.
Next is a cache variable that holds the new instance of InMemoryCache.
The client variable also takes an instance of ApolloClient and wraps the link and cache.
Lastly, we export the client so that we can use it across the application.
Before we get to see this in action, we’ve got to make sure that our entire app is exposed to Apollo and that our app can receive data fetched from the server and that it can mutate that data.
To achieve this, let’s head over to client/src/index.js:
import React from 'react' import ReactDOM from 'react-dom' import { BrowserRouter } from 'react-router-dom' import { ApolloProvider } from '@apollo/react-hooks' import App from './components/App' import client from './client' import './index.css' const Root = () => ( <BrowserRouter> <ApolloProvider client={client}> <App /> </ApolloProvider> </BrowserRouter> ); ReactDOM.render(<Root />, document.getElementById('app')) if (module.hot) { module.hot.accept() }
As you’ll notice in the highlighted code, we’ve wrapped the App component in ApolloProvider and passed the client as a prop to the client. ApolloProvider is similar to React’s Context.Provider. It wraps your React app and places the client in context, which allows you to access it from anywhere in your component tree.
To fetch our pets from the server, we need to write queries that request the exact fields that we want. Head over to client/src/pages/Pets.js, and copy and paste the following code into it:
import React, {useState} from 'react' import gql from 'graphql-tag' import { useQuery, useMutation } from '@apollo/react-hooks' import PetsList from '../components/PetsList' import NewPetModal from '../components/NewPetModal' import Loader from '../components/Loader' const GET_PETS = gql` query getPets { pets { id name type img } } `; export default function Pets () { const [modal, setModal] = useState(false) const { loading, error, data } = useQuery(GET_PETS); if (loading) return <Loader />; if (error) return <p>An error occured!</p>; const onSubmit = input => { setModal(false) } if (modal) { return <NewPetModal onSubmit={onSubmit} onCancel={() => setModal(false)} /> } return ( <div className="page pets-page"> <section> <div className="row betwee-xs middle-xs"> <div className="col-xs-10"> <h1>Pets</h1> </div> <div className="col-xs-2"> <button onClick={() => setModal(true)}>new pet</button> </div> </div> </section> <section> <PetsList pets={data.pets}/> </section> </div> ) }
With a few bits of code, we are able to fetch the pets from the server.
What Is gql?
It’s important to note that operations in GraphQL are generally JSON objects written with graphql-tag and with backticks.
gql tags are JavaScript template literal tags that parse GraphQL query strings into the GraphQL AST (abstract syntax tree).
Query operations In order to fetch our pets from the server, we need to perform a query operation.
Because we’re making a query operation, we needed to specify the type of operation before naming it.
The name of our query is GET_PETS. It’s a naming convention of GraphQL to use camelCase for field names.
The name of our fields is pets. Hence, we specify the exact fields that we need from the server (id, name, type, img).
useQuery is a React hook that is the basis for executing queries in an Apollo application. To perform a query operation in our React component, we call the useQuery hook, which was initially imported from @apollo/react-hooks. Next, we pass it a GraphQL query string, which is GET_PETS in our case.
When our component renders, useQuery returns an object response from Apollo Client that contains loading, error, and data properties. Thus, they are destructured, so that we can use them to render the UI.
useQuery is awesome. We don’t have to include async-await. It’s already taken care of in the background. Pretty cool, isn’t it?
loading This property helps us handle the loading state of the application. In our case, we return a Loader component while our application loads. By default, loading is false.
error Just in case, we use this property to handle any error that might occur.
data This contains our actual data from the server.
Lastly, in our PetsList component, we pass the pets props, with data.pets as an object value.
At this point, we have successfully queried our server.
To start our application, let’s run the following command:
Start the client app. Run the command npm run app in your CLI.
Start the server. Run the command npm run server in another CLI.
VScode CLI partitioned to start both the client and the server. (Large preview)
If all went well, you should see this:
Pets queried from the server.
Mutating Data
Mutating data or creating data in Apollo Client is almost the same as querying data, with very slight changes.
Still in client/src/pages/Pets.js, let’s copy and paste the highlighted code:
.... const GET_PETS = gql` query getPets { pets { id name type img } } `; const NEW_PETS = gql` mutation CreateAPet($newPet: NewPetInput!) { addPet(input: $newPet) { id name type img } } `; const Pets = () => { const [modal, setModal] = useState(false) const { loading, error, data } = useQuery(GET_PETS); const [createPet, newPet] = useMutation(NEW_PETS); const onSubmit = input => { setModal(false) createPet({ variables: { newPet: input } }); } if (loading || newPet.loading) return <Loader />; if (error || newPet.error) return <p>An error occured</p>; if (modal) { return <NewPetModal onSubmit={onSubmit} onCancel={() => setModal(false)} /> } return ( <div className="page pets-page"> <section> <div className="row betwee-xs middle-xs"> <div className="col-xs-10"> <h1>Pets</h1> </div> <div className="col-xs-2"> <button onClick={() => setModal(true)}>new pet</button> </div> </div> </section> <section> <PetsList pets={data.pets}/> </section> </div> ) } export default Pets
To create a mutation, we would take the following steps.
1. mutation
To create, update, or delete, we need to perform the mutation operation. The mutation operation has a CreateAPet name, with one argument. This argument has a $newPet variable, with a type of NewPetInput. The ! means that the operation is required; thus, GraphQL won’t execute the operation unless we pass a newPet variable whose type is NewPetInput.
2. addPet
The addPet function, which is inside the mutation operation, takes an argument of input and is set to our $newPet variable. The field sets specified in our addPet function must be equal to the field sets in our query. The field sets in our operation are:
id
name
type
img
3. useMutation
The useMutation React hook is the primary API for executing mutations in an Apollo application. When we need to mutate data, we call useMutation in a React component and pass it a GraphQL string (in our case, NEW_PETS).
When our component renders useMutation, it returns a tuple (that is, an ordered set of data constituting a record) in an array that includes:
a mutate function that we can call at any time to execute the mutation;
an object with fields that represent the current status of the mutation’s execution.
The useMutation hook is passed a GraphQL mutation string (which is NEW_PETS in our case). We destructured the tuple, which is the function (createPet) that will mutate the data and the object field (newPets).
4. createPet
In our onSubmit function, shortly after the setModal state, we defined our createPet. This function takes a variable with an object property of a value set to { newPet: input }. The input represents the various input fields in our form (such as name, type, etc.).
With that done, the outcome should look like this:
Mutation without instant update.
If you observe the GIF closely, you’ll notice that our created pet doesn’t show up instantly, only when the page is refreshed. However, it has been updated on the server.
The big question is, why doesn’t our pet update instantly? Let’s find out in the next section.
Caching In Apollo Client
The reason our app doesn’t update automatically is that our newly created data doesn’t match the cache data in Apollo Client. So, there is a conflict as to what exactly it needs to be updated from the cache.
Simply put, if we perform a mutation that updates or deletes multiple entries (a node), then we are responsible for updating any queries referencing that node, so that it modifies our cached data to match the modifications that a mutation makes to our back-end data.
Keeping Cache In Sync
There are a few ways to keep our cache in sync each time we perform a mutation operation.
The first is by refetching matching queries after a mutation, using the refetchQueries object property (the simplest way).
Note: If we were to use this method, it would take an object property in our createPet function called refetchQueries, and it would contain an array of objects with a value of the query: refetchQueries: [{ query: GET_PETS }].
Because our focus in this section isn’t just to update our created pets in the UI, but to manipulate the cache, we won’t be using this method.
The second approach is to use the update function. In Apollo Client, there’s an update helper function that helps modify the cache data, so that it syncs with the modifications that a mutation makes to our back-end data. Using this function, we can read and write to the cache.
Updating The Cache
Copy the following highlighted code, and paste it in client/src/pages/Pets.js:
...... const Pets = () => { const [modal, setModal] = useState(false) const { loading, error, data } = useQuery(GET_PETS); const [createPet, newPet] = useMutation(NEW_PETS, { update(cache, { data: { addPet } }) { const data = cache.readQuery({ query: GET_PETS }); cache.writeQuery({ query: GET_PETS, data: { pets: [addPet, ...data.pets] }, }); }, } ); .....
The update function receives two arguments:
The first argument is the cache from Apollo Client.
The second is the exact mutation response from the server. We destructure the data property and set it to our mutation (addPet).
Next, to update the function, we need to check for what query needs to be updated (in our case, the GET_PETS query) and read the cache.
Secondly, we need to write to the query that was read, so that it knows we’re about to update it. We do so by passing an object that contains a query object property, with the value set to our query operation (GET_PETS), and a data property whose value is a pet object and that has an array of the addPet mutation and a copy of the pet’s data.
If you followed these steps carefully, you should see your pets update automatically as you create them. Let’s take a look at the changes:
Pets updates instantly.
Optimistic UI
A lot of people are big fans of loaders and spinners. There’s nothing wrong with using a loader; there are perfect use cases where a loader is the best option. I’ve written about loaders versus spinners and their best use cases.
Loaders and spinners indeed play an important role in UI and UX design, but the arrival of Optimistic UI has stolen the spotlight.
What Is Optimistic UI?
Optimistic UI is a convention that simulates the results of a mutation (created data) and updates the UI before receiving a response from the server. Once the response is received from the server, the optimistic result is thrown away and replaced with the actual result.
In the end, an optimistic UI is nothing more than a way to manage perceived performance and avoid loading states.
Apollo Client has a very interesting way of integrating the Optimistic UI. It gives us a simple hook that allows us to write to the local cache after mutation. Let’s see how it works!
Step 1
Head over to client/src/client.js, and add only the highlighted code.
import { ApolloClient } from 'apollo-client' import { InMemoryCache } from 'apollo-cache-inmemory' import { HttpLink } from 'apollo-link-http' import { setContext } from 'apollo-link-context' import { ApolloLink } from 'apollo-link' const http = new HttpLink({ uri: "http://localhost:4000/" }); const delay = setContext( request => new Promise((success, fail) => { setTimeout(() => { success() }, 800) }) ) const link = ApolloLink.from([ delay, http ]) const cache = new InMemoryCache() const client = new ApolloClient({ link, cache }) export default client
The first step involves the following:
We import setContext from apollo-link-context. The setContext function takes a callback function and returns a promise whose setTimeout is set to 800ms, in order to create a delay when a mutation operation is performed.
The ApolloLink.from method ensures that the network activity that represents the link (our API) from HTTP is delayed.
Step 2
The next step is using the Optimistic UI hook. Slide back to client/src/pages/Pets.js, and add only the highlighted code below.
..... const Pets = () => { const [modal, setModal] = useState(false) const { loading, error, data } = useQuery(GET_PETS); const [createPet, newPet] = useMutation(NEW_PETS, { update(cache, { data: { addPet } }) { const data = cache.readQuery({ query: GET_PETS }); cache.writeQuery({ query: GET_PETS, data: { pets: [addPet, ...data.pets] }, }); }, } ); const onSubmit = input => { setModal(false) createPet({ variables: { newPet: input }, optimisticResponse: { __typename: 'Mutation', addPet: { __typename: 'Pet', id: Math.floor(Math.random() * 10000 + ''), name: input.name, type: input.type, img: 'https://via.placeholder.com/200' } } }); } .....
The optimisticResponse object is used if we want the UI to update immediately when we create a pet, instead of waiting for the server response.
The code snippets above include the following:
__typename is injected by Apollo into the query to fetch the type of the queried entities. Those types are used by Apollo Client to build the id property (which is a symbol) for caching purposes in apollo-cache. So, __typename is a valid property of the query response.
The mutation is set as the __typename of optimisticResponse.
Just as earlier defined, our mutation’s name is addPet, and the __typename is Pet.
Next are the fields of our mutation that we want the optimistic response to update:
id Because we don’t know what the ID from the server will be, we made one up using Math.floor.
name This value is set to input.name.
type The type’s value is input.type.
img Now, because our server generates images for us, we used a placeholder to mimic our image from the server.
This was indeed a long ride. If you got to the end, don’t hesitate to take a break from your chair with your cup of coffee.
Let’s take a look at our outcome. The supporting repository for this project is on GitHub. Clone and experiment with it.
Final result of our app.
Conclusion
The amazing features of Apollo Client, such as the Optimistic UI and pagination, make building client-side apps a reality.
While Apollo Client works very well with other frameworks, such as Vue.js and Angular, React developers have Apollo Client Hooks, and so they can’t help but enjoy building a great app.
In this article, we’ve only scratched the surface. Mastering Apollo Client demands constant practice. So, go ahead and clone the repository, add pagination, and play around with the other features it offers.
Please do share your feedback and experience in the comments section below. We can also discuss your progress on Twitter. Cheers!
References
(ks, ra, al, yk, il)
Website Design & SEO Delray Beach by DBL07.co
Delray Beach SEO
source http://www.scpie.org/understanding-client-side-graphql-with-apollo-client-in-react-apps/ source https://scpie.tumblr.com/post/625015311855419392
0 notes
Text
Understanding Client-Side GraphQl With Apollo-Client In React Apps
About The Author
Blessing Krofegha is a Software Engineer Based in Lagos Nigeria, with a burning desire to contribute to making the web awesome for all, by writing and building … More about Blessing …
Ever tried interacting with a GraphQL server in a client-side application and felt like giving up even before getting anywhere? Ever declined an invitation to join a code base that requires working with GraphQL API because you had no idea? Ever felt like the only front-end engineer who hasn’t learned how to consume GraphQL APIs? If you answered yes to any of these questions, then this tutorial is for you. We’ll be taking a closer look at a few basics of GraphQL and Apollo Client, as well as how to work with both of them. By the end, we’ll have built a pet shop app that uses Apollo Client. Then, you can go on to build your next project.
According to State of JavaScript 2019, 38.7% of developers would like to use GraphQL, while 50.8% of developers would like to learn GraphQL.
Being a query language, GraphQL simplifies the workflow of building a client application. It removes the complexity of managing API endpoints in client-side apps because it exposes a single HTTP endpoint to fetch the required data. Hence, it eliminates overfetching and underfetching of data, as in the case of REST.
But GraphQL is just a query language. In order to use it easily, we need a platform that does the heavy lifting for us. One such platform is Apollo.
The Apollo platform is an implementation of GraphQL that transfers data between the cloud (the server) to the UI of your app. When you use Apollo Client, all of the logic for retrieving data, tracking, loading, and updating the UI is encapsulated by the useQuery hook (as in the case of React). Hence, data fetching is declarative. It also has zero-configuration caching. Just by setting up Apollo Client in your app, you get an intelligent cache out of the box, with no additional configuration required.
Apollo Client is also interoperable with other frameworks, such as Angular, Vue.js, and React.
Note: This tutorial will benefit those who have worked with RESTful or other forms of APIs in the past on the client-side and want to see whether GraphQL is worth taking a shot at. This means you should have worked with an API before; only then will you be able to understand how beneficial GraphQL could be to you. While we will be covering a few basics of GraphQL and Apollo Client, a good knowledge of JavaScript and React Hooks will come in handy.
GraphQL Basics
This article isn’t a complete introduction to GraphQL, but we will define a few conventions before continuing.
What Is GraphQL?
GraphQL is a specification that describes a declarative query language that your clients can use to ask an API for the exact data they want. This is achieved by creating a strong type schema for your API, with ultimate flexibility. It also ensures that the API resolves data and that client queries are validated against a schema. This definition means that GraphQL contains some specifications that make it a declarative query language, with an API that is statically typed (built around Typescript) and making it possible for the client to leverage those type systems to ask the API for the exact data it wants.
So, if we created some types with some fields in them, then, from the client-side, we could say, “Give us this data with these exact fields”. Then the API will respond with that exact shape, just as if we were using a type system in a strongly typed language. You can learn more in my Typescript article.
Let’s look at some conventions of GraphQl that will help us as we continue.
The Basics
Operations In GraphQL, every action performed is called an operation. There are a few operations, namely:
Query This operation is concerned with fetching data from the server. You could also call it a read-only fetch.
Mutation This operation involves creating, updating, and deleting data from a server. It is popularly called a CUD (create, update, and delete) operation.
Subscriptions This operation in GraphQL involves sending data from a server to its clients when specific events take place. They are usually implemented with WebSockets.
In this article, we will be dealing only with query and mutation operations.
Operation names There are unique names for your client-side query and mutation operations.
Variables and arguments Operations can define arguments, very much like a function in most programming languages. Those variables can then be passed to query or mutation calls inside the operation as arguments. Variables are expected to be given at runtime during the execution of an operation from your client.
Aliasing This is a convention in client-side GraphQL that involves renaming verbose or vague field names with simple and readable field names for the UI. Aliasing is necessary in use cases where you don’t want to have conflicting field names.
GraphQL basic conventions. (Large preview)
What Is Client-Side GraphQL?
When a front-end engineer builds UI components using any framework, like Vue.js or (in our case) React, those components are modeled and designed from a certain pattern on the client to suit the data that will be fetched from the server.
One of the most common problems with RESTful APIs is overfetching and underfetching. This happens because the only way for a client to download data is by hitting endpoints that return fixed data structures. Overfetching in this context means that a client downloads more information than is required by the app.
In GraphQL, on the other hand, you’d simply send a single query to the GraphQL server that includes the required data. The server would then respond with a JSON object of the exact data you’ve requested — hence, no overfetching. Sebastian Eschweiler explains the differences between RESTful APIs and GraphQL.
Client-side GraphQL is a client-side infrastructure that interfaces with data from a GraphQL server to perform the following functions:
It manages data by sending queries and mutating data without you having to construct HTTP requests all by yourself. You can spend less time plumbing data and more time building the actual application.
It manages the complexity of a cache for you. So, you can store and retrieve the data fetched from the server, without any third-party interference, and easily avoid refetching duplicate resources. Thus, it identifies when two resources are the same, which is great for a complex app.
It keeps your UI consistent with Optimistic UI, a convention that simulates the results of a mutation (i.e. the created data) and updates the UI even before receiving a response from the server. Once the response is received from the server, the optimistic result is thrown away and replaced with the actual result.
For further information about client-side GraphQL, spare an hour with the cocreator of GraphQL and other cool folks on GraphQL Radio.
What Is Apollo Client?
Apollo Client is an interoperable, ultra-flexible, community-driven GraphQL client for JavaScript and native platforms. Its impressive features include a robust state-management tool (Apollo Link), a zero-config caching system, a declarative approach to fetching data, easy-to-implement pagination, and the Optimistic UI for your client-side application.
Apollo Client stores not only the state from the data fetched from the server, but also the state that it has created locally on your client; hence, it manages state for both API data and local data.
It’s also important to note that you can use Apollo Client alongside other state-management tools, like RedUX, without conflict. Plus, it’s possible to migrate your state management from, say, Redux to Apollo Client (which is beyond the scope of this article). Ultimately, the main purpose of Apollo Client is to enable engineers to query data in an API seamlessly.
Features of Apollo Client
Apollo Client has won over so many engineers and companies because of its extremely helpful features that make building modern robust applications a breeze. The following features come baked in:
Caching Apollo Client supports caching on the fly.
Optimistic UI Apollo Client has cool support for the Optimistic UI. It involves temporarily displaying the final state of an operation (mutation) while the operation is in progress. Once the operation is complete, the real data replaces the optimistic data.
Pagination Apollo Client has built-in functionality that makes it quite easy to implement pagination in your application. It takes care of most of the technical headaches of fetching a list of data, either in patches or at once, using the fetchMore function, which comes with the useQuery hook.
In this article, we will look at a selection of these features.
Enough of the theory. Tighten your seat belt and grab a cup of coffee to go with your pancakes, as we get our hands dirty.
Building Our Web App
This project is inspired by Scott Moss.
We will be building a simple pet shop web app, whose features include:
fetching our pets from the server-side;
creating a pet (which involves creating the name, type of pet, and image);
using the Optimistic UI;
using pagination to segment our data.
To begin, clone the repository, ensuring that the starter branch is what you’ve cloned.
Getting Started
Install the Apollo Client Developer Tools extension for Chrome.
Using the command-line interface (CLI), navigate to the directory of the cloned repository, and run the command to get all dependencies: npm install.
Run the command npm run app to start the app.
While still in the root folder, run the command npm run server. This will start our back-end server for us, which we’ll use as we proceed.
The app should open up in a configured port. Mine is http://localhost:1234/; yours is probably something else.
If everything worked well, your app should look like this:
Cloned starter branch UI. (Large preview)
You’ll notice that we’ve got no pets to display. That’s because we haven’t created such functionality yet.
If you’ve installed Apollo Client Developer Tools correctly, open up the developer tools and click on the tray icon. You’ll see “Apollo” and something like this:
Apollo Client Developer Tools. (Large preview)
Like the RedUX and React developer tools, we will be using Apollo Client Developer Tools to write and test our queries and mutations. The extension comes with the GraphQL Playground.
Fetching Pets
Let’s add the functionality that fetches pets. Move over to client/src/client.js. We’ll be writing Apollo Client, linking it to an API, exporting it as a default client, and writing a new query.
Copy the following code and paste it in client.js:
import { ApolloClient } from 'apollo-client' import { InMemoryCache } from 'apollo-cache-inmemory' import { HttpLink } from 'apollo-link-http' const link = new HttpLink({ uri: 'https://localhost:4000/' }) const cache = new InMemoryCache() const client = new ApolloClient({ link, cache }) export default client
Here’s an explanation of what is happening above:
ApolloClient This will be the function that wraps our app and, thus, interfaces with the HTTP, caches the data, and updates the UI.
InMemoryCache This is the normalized data store in Apollo Client that helps with manipulating the cache in our application.
HttpLink This is a standard network interface for modifying the control flow of GraphQL requests and fetching GraphQL results. It acts as middleware, fetching results from the GraphQL server each time the link is fired. Plus, it’s a good substitute for other options, like Axios and window.fetch.
We declare a link variable that is assigned to an instance of HttpLink. It takes a uri property and a value to our server, which is https://localhost:4000/.
Next is a cache variable that holds the new instance of InMemoryCache.
The client variable also takes an instance of ApolloClient and wraps the link and cache.
Lastly, we export the client so that we can use it across the application.
Before we get to see this in action, we’ve got to make sure that our entire app is exposed to Apollo and that our app can receive data fetched from the server and that it can mutate that data.
To achieve this, let’s head over to client/src/index.js:
import React from 'react' import ReactDOM from 'react-dom' import { BrowserRouter } from 'react-router-dom' import { ApolloProvider } from '@apollo/react-hooks' import App from './components/App' import client from './client' import './index.css' const Root = () => ( <BrowserRouter> <ApolloProvider client={client}> <App /> </ApolloProvider> </BrowserRouter> ); ReactDOM.render(<Root />, document.getElementById('app')) if (module.hot) { module.hot.accept() }
As you’ll notice in the highlighted code, we’ve wrapped the App component in ApolloProvider and passed the client as a prop to the client. ApolloProvider is similar to React’s Context.Provider. It wraps your React app and places the client in context, which allows you to access it from anywhere in your component tree.
To fetch our pets from the server, we need to write queries that request the exact fields that we want. Head over to client/src/pages/Pets.js, and copy and paste the following code into it:
import React, {useState} from 'react' import gql from 'graphql-tag' import { useQuery, useMutation } from '@apollo/react-hooks' import PetsList from '../components/PetsList' import NewPetModal from '../components/NewPetModal' import Loader from '../components/Loader' const GET_PETS = gql` query getPets { pets { id name type img } } `; export default function Pets () { const [modal, setModal] = useState(false) const { loading, error, data } = useQuery(GET_PETS); if (loading) return <Loader />; if (error) return <p>An error occured!</p>; const onSubmit = input => { setModal(false) } if (modal) { return <NewPetModal onSubmit={onSubmit} onCancel={() => setModal(false)} /> } return ( <div className="page pets-page"> <section> <div className="row betwee-xs middle-xs"> <div className="col-xs-10"> <h1>Pets</h1> </div> <div className="col-xs-2"> <button onClick={() => setModal(true)}>new pet</button> </div> </div> </section> <section> <PetsList pets={data.pets}/> </section> </div> ) }
With a few bits of code, we are able to fetch the pets from the server.
What Is gql?
It’s important to note that operations in GraphQL are generally JSON objects written with graphql-tag and with backticks.
gql tags are JavaScript template literal tags that parse GraphQL query strings into the GraphQL AST (abstract syntax tree).
Query operations In order to fetch our pets from the server, we need to perform a query operation.
Because we’re making a query operation, we needed to specify the type of operation before naming it.
The name of our query is GET_PETS. It’s a naming convention of GraphQL to use camelCase for field names.
The name of our fields is pets. Hence, we specify the exact fields that we need from the server (id, name, type, img).
useQuery is a React hook that is the basis for executing queries in an Apollo application. To perform a query operation in our React component, we call the useQuery hook, which was initially imported from @apollo/react-hooks. Next, we pass it a GraphQL query string, which is GET_PETS in our case.
When our component renders, useQuery returns an object response from Apollo Client that contains loading, error, and data properties. Thus, they are destructured, so that we can use them to render the UI.
useQuery is awesome. We don’t have to include async-await. It’s already taken care of in the background. Pretty cool, isn’t it?
loading This property helps us handle the loading state of the application. In our case, we return a Loader component while our application loads. By default, loading is false.
error Just in case, we use this property to handle any error that might occur.
data This contains our actual data from the server.
Lastly, in our PetsList component, we pass the pets props, with data.pets as an object value.
At this point, we have successfully queried our server.
To start our application, let’s run the following command:
Start the client app. Run the command npm run app in your CLI.
Start the server. Run the command npm run server in another CLI.
VScode CLI partitioned to start both the client and the server. (Large preview)
If all went well, you should see this:
Pets queried from the server.
Mutating Data
Mutating data or creating data in Apollo Client is almost the same as querying data, with very slight changes.
Still in client/src/pages/Pets.js, let’s copy and paste the highlighted code:
.... const GET_PETS = gql` query getPets { pets { id name type img } } `; const NEW_PETS = gql` mutation CreateAPet($newPet: NewPetInput!) { addPet(input: $newPet) { id name type img } } `; const Pets = () => { const [modal, setModal] = useState(false) const { loading, error, data } = useQuery(GET_PETS); const [createPet, newPet] = useMutation(NEW_PETS); const onSubmit = input => { setModal(false) createPet({ variables: { newPet: input } }); } if (loading || newPet.loading) return <Loader />; if (error || newPet.error) return <p>An error occured</p>; if (modal) { return <NewPetModal onSubmit={onSubmit} onCancel={() => setModal(false)} /> } return ( <div className="page pets-page"> <section> <div className="row betwee-xs middle-xs"> <div className="col-xs-10"> <h1>Pets</h1> </div> <div className="col-xs-2"> <button onClick={() => setModal(true)}>new pet</button> </div> </div> </section> <section> <PetsList pets={data.pets}/> </section> </div> ) } export default Pets
To create a mutation, we would take the following steps.
1. mutation
To create, update, or delete, we need to perform the mutation operation. The mutation operation has a CreateAPet name, with one argument. This argument has a $newPet variable, with a type of NewPetInput. The ! means that the operation is required; thus, GraphQL won’t execute the operation unless we pass a newPet variable whose type is NewPetInput.
2. addPet
The addPet function, which is inside the mutation operation, takes an argument of input and is set to our $newPet variable. The field sets specified in our addPet function must be equal to the field sets in our query. The field sets in our operation are:
id
name
type
img
3. useMutation
The useMutation React hook is the primary API for executing mutations in an Apollo application. When we need to mutate data, we call useMutation in a React component and pass it a GraphQL string (in our case, NEW_PETS).
When our component renders useMutation, it returns a tuple (that is, an ordered set of data constituting a record) in an array that includes:
a mutate function that we can call at any time to execute the mutation;
an object with fields that represent the current status of the mutation’s execution.
The useMutation hook is passed a GraphQL mutation string (which is NEW_PETS in our case). We destructured the tuple, which is the function (createPet) that will mutate the data and the object field (newPets).
4. createPet
In our onSubmit function, shortly after the setModal state, we defined our createPet. This function takes a variable with an object property of a value set to { newPet: input }. The input represents the various input fields in our form (such as name, type, etc.).
With that done, the outcome should look like this:
Mutation without instant update.
If you observe the GIF closely, you’ll notice that our created pet doesn’t show up instantly, only when the page is refreshed. However, it has been updated on the server.
The big question is, why doesn’t our pet update instantly? Let’s find out in the next section.
Caching In Apollo Client
The reason our app doesn’t update automatically is that our newly created data doesn’t match the cache data in Apollo Client. So, there is a conflict as to what exactly it needs to be updated from the cache.
Simply put, if we perform a mutation that updates or deletes multiple entries (a node), then we are responsible for updating any queries referencing that node, so that it modifies our cached data to match the modifications that a mutation makes to our back-end data.
Keeping Cache In Sync
There are a few ways to keep our cache in sync each time we perform a mutation operation.
The first is by refetching matching queries after a mutation, using the refetchQueries object property (the simplest way).
Note: If we were to use this method, it would take an object property in our createPet function called refetchQueries, and it would contain an array of objects with a value of the query: refetchQueries: [{ query: GET_PETS }].
Because our focus in this section isn’t just to update our created pets in the UI, but to manipulate the cache, we won’t be using this method.
The second approach is to use the update function. In Apollo Client, there’s an update helper function that helps modify the cache data, so that it syncs with the modifications that a mutation makes to our back-end data. Using this function, we can read and write to the cache.
Updating The Cache
Copy the following highlighted code, and paste it in client/src/pages/Pets.js:
...... const Pets = () => { const [modal, setModal] = useState(false) const { loading, error, data } = useQuery(GET_PETS); const [createPet, newPet] = useMutation(NEW_PETS, { update(cache, { data: { addPet } }) { const data = cache.readQuery({ query: GET_PETS }); cache.writeQuery({ query: GET_PETS, data: { pets: [addPet, ...data.pets] }, }); }, } ); .....
The update function receives two arguments:
The first argument is the cache from Apollo Client.
The second is the exact mutation response from the server. We destructure the data property and set it to our mutation (addPet).
Next, to update the function, we need to check for what query needs to be updated (in our case, the GET_PETS query) and read the cache.
Secondly, we need to write to the query that was read, so that it knows we’re about to update it. We do so by passing an object that contains a query object property, with the value set to our query operation (GET_PETS), and a data property whose value is a pet object and that has an array of the addPet mutation and a copy of the pet’s data.
If you followed these steps carefully, you should see your pets update automatically as you create them. Let’s take a look at the changes:
Pets updates instantly.
Optimistic UI
A lot of people are big fans of loaders and spinners. There’s nothing wrong with using a loader; there are perfect use cases where a loader is the best option. I’ve written about loaders versus spinners and their best use cases.
Loaders and spinners indeed play an important role in UI and UX design, but the arrival of Optimistic UI has stolen the spotlight.
What Is Optimistic UI?
Optimistic UI is a convention that simulates the results of a mutation (created data) and updates the UI before receiving a response from the server. Once the response is received from the server, the optimistic result is thrown away and replaced with the actual result.
In the end, an optimistic UI is nothing more than a way to manage perceived performance and avoid loading states.
Apollo Client has a very interesting way of integrating the Optimistic UI. It gives us a simple hook that allows us to write to the local cache after mutation. Let’s see how it works!
Step 1
Head over to client/src/client.js, and add only the highlighted code.
import { ApolloClient } from 'apollo-client' import { InMemoryCache } from 'apollo-cache-inmemory' import { HttpLink } from 'apollo-link-http' import { setContext } from 'apollo-link-context' import { ApolloLink } from 'apollo-link' const http = new HttpLink({ uri: "http://localhost:4000/" }); const delay = setContext( request => new Promise((success, fail) => { setTimeout(() => { success() }, 800) }) ) const link = ApolloLink.from([ delay, http ]) const cache = new InMemoryCache() const client = new ApolloClient({ link, cache }) export default client
The first step involves the following:
We import setContext from apollo-link-context. The setContext function takes a callback function and returns a promise whose setTimeout is set to 800ms, in order to create a delay when a mutation operation is performed.
The ApolloLink.from method ensures that the network activity that represents the link (our API) from HTTP is delayed.
Step 2
The next step is using the Optimistic UI hook. Slide back to client/src/pages/Pets.js, and add only the highlighted code below.
..... const Pets = () => { const [modal, setModal] = useState(false) const { loading, error, data } = useQuery(GET_PETS); const [createPet, newPet] = useMutation(NEW_PETS, { update(cache, { data: { addPet } }) { const data = cache.readQuery({ query: GET_PETS }); cache.writeQuery({ query: GET_PETS, data: { pets: [addPet, ...data.pets] }, }); }, } ); const onSubmit = input => { setModal(false) createPet({ variables: { newPet: input }, optimisticResponse: { __typename: 'Mutation', addPet: { __typename: 'Pet', id: Math.floor(Math.random() * 10000 + ''), name: input.name, type: input.type, img: 'https://via.placeholder.com/200' } } }); } .....
The optimisticResponse object is used if we want the UI to update immediately when we create a pet, instead of waiting for the server response.
The code snippets above include the following:
__typename is injected by Apollo into the query to fetch the type of the queried entities. Those types are used by Apollo Client to build the id property (which is a symbol) for caching purposes in apollo-cache. So, __typename is a valid property of the query response.
The mutation is set as the __typename of optimisticResponse.
Just as earlier defined, our mutation’s name is addPet, and the __typename is Pet.
Next are the fields of our mutation that we want the optimistic response to update:
id Because we don’t know what the ID from the server will be, we made one up using Math.floor.
name This value is set to input.name.
type The type’s value is input.type.
img Now, because our server generates images for us, we used a placeholder to mimic our image from the server.
This was indeed a long ride. If you got to the end, don’t hesitate to take a break from your chair with your cup of coffee.
Let’s take a look at our outcome. The supporting repository for this project is on GitHub. Clone and experiment with it.
Final result of our app.
Conclusion
The amazing features of Apollo Client, such as the Optimistic UI and pagination, make building client-side apps a reality.
While Apollo Client works very well with other frameworks, such as Vue.js and Angular, React developers have Apollo Client Hooks, and so they can’t help but enjoy building a great app.
In this article, we’ve only scratched the surface. Mastering Apollo Client demands constant practice. So, go ahead and clone the repository, add pagination, and play around with the other features it offers.
Please do share your feedback and experience in the comments section below. We can also discuss your progress on Twitter. Cheers!
References
(ks, ra, al, yk, il)
Website Design & SEO Delray Beach by DBL07.co
Delray Beach SEO
source http://www.scpie.org/understanding-client-side-graphql-with-apollo-client-in-react-apps/
0 notes
Text
Understanding Client-Side GraphQl With Apollo-Client In React Apps
About The Author
Blessing Krofegha is a Software Engineer Based in Lagos Nigeria, with a burning desire to contribute to making the web awesome for all, by writing and building … More about Blessing …
Ever tried interacting with a GraphQL server in a client-side application and felt like giving up even before getting anywhere? Ever declined an invitation to join a code base that requires working with GraphQL API because you had no idea? Ever felt like the only front-end engineer who hasn’t learned how to consume GraphQL APIs? If you answered yes to any of these questions, then this tutorial is for you. We’ll be taking a closer look at a few basics of GraphQL and Apollo Client, as well as how to work with both of them. By the end, we’ll have built a pet shop app that uses Apollo Client. Then, you can go on to build your next project.
According to State of JavaScript 2019, 38.7% of developers would like to use GraphQL, while 50.8% of developers would like to learn GraphQL.
Being a query language, GraphQL simplifies the workflow of building a client application. It removes the complexity of managing API endpoints in client-side apps because it exposes a single HTTP endpoint to fetch the required data. Hence, it eliminates overfetching and underfetching of data, as in the case of REST.
But GraphQL is just a query language. In order to use it easily, we need a platform that does the heavy lifting for us. One such platform is Apollo.
The Apollo platform is an implementation of GraphQL that transfers data between the cloud (the server) to the UI of your app. When you use Apollo Client, all of the logic for retrieving data, tracking, loading, and updating the UI is encapsulated by the useQuery hook (as in the case of React). Hence, data fetching is declarative. It also has zero-configuration caching. Just by setting up Apollo Client in your app, you get an intelligent cache out of the box, with no additional configuration required.
Apollo Client is also interoperable with other frameworks, such as Angular, Vue.js, and React.
Note: This tutorial will benefit those who have worked with RESTful or other forms of APIs in the past on the client-side and want to see whether GraphQL is worth taking a shot at. This means you should have worked with an API before; only then will you be able to understand how beneficial GraphQL could be to you. While we will be covering a few basics of GraphQL and Apollo Client, a good knowledge of JavaScript and React Hooks will come in handy.
GraphQL Basics
This article isn’t a complete introduction to GraphQL, but we will define a few conventions before continuing.
What Is GraphQL?
GraphQL is a specification that describes a declarative query language that your clients can use to ask an API for the exact data they want. This is achieved by creating a strong type schema for your API, with ultimate flexibility. It also ensures that the API resolves data and that client queries are validated against a schema. This definition means that GraphQL contains some specifications that make it a declarative query language, with an API that is statically typed (built around Typescript) and making it possible for the client to leverage those type systems to ask the API for the exact data it wants.
So, if we created some types with some fields in them, then, from the client-side, we could say, “Give us this data with these exact fields”. Then the API will respond with that exact shape, just as if we were using a type system in a strongly typed language. You can learn more in my Typescript article.
Let’s look at some conventions of GraphQl that will help us as we continue.
The Basics
Operations In GraphQL, every action performed is called an operation. There are a few operations, namely:
Query This operation is concerned with fetching data from the server. You could also call it a read-only fetch.
Mutation This operation involves creating, updating, and deleting data from a server. It is popularly called a CUD (create, update, and delete) operation.
Subscriptions This operation in GraphQL involves sending data from a server to its clients when specific events take place. They are usually implemented with WebSockets.
In this article, we will be dealing only with query and mutation operations.
Operation names There are unique names for your client-side query and mutation operations.
Variables and arguments Operations can define arguments, very much like a function in most programming languages. Those variables can then be passed to query or mutation calls inside the operation as arguments. Variables are expected to be given at runtime during the execution of an operation from your client.
Aliasing This is a convention in client-side GraphQL that involves renaming verbose or vague field names with simple and readable field names for the UI. Aliasing is necessary in use cases where you don’t want to have conflicting field names.
GraphQL basic conventions. (Large preview)
What Is Client-Side GraphQL?
When a front-end engineer builds UI components using any framework, like Vue.js or (in our case) React, those components are modeled and designed from a certain pattern on the client to suit the data that will be fetched from the server.
One of the most common problems with RESTful APIs is overfetching and underfetching. This happens because the only way for a client to download data is by hitting endpoints that return fixed data structures. Overfetching in this context means that a client downloads more information than is required by the app.
In GraphQL, on the other hand, you’d simply send a single query to the GraphQL server that includes the required data. The server would then respond with a JSON object of the exact data you’ve requested — hence, no overfetching. Sebastian Eschweiler explains the differences between RESTful APIs and GraphQL.
Client-side GraphQL is a client-side infrastructure that interfaces with data from a GraphQL server to perform the following functions:
It manages data by sending queries and mutating data without you having to construct HTTP requests all by yourself. You can spend less time plumbing data and more time building the actual application.
It manages the complexity of a cache for you. So, you can store and retrieve the data fetched from the server, without any third-party interference, and easily avoid refetching duplicate resources. Thus, it identifies when two resources are the same, which is great for a complex app.
It keeps your UI consistent with Optimistic UI, a convention that simulates the results of a mutation (i.e. the created data) and updates the UI even before receiving a response from the server. Once the response is received from the server, the optimistic result is thrown away and replaced with the actual result.
For further information about client-side GraphQL, spare an hour with the cocreator of GraphQL and other cool folks on GraphQL Radio.
What Is Apollo Client?
Apollo Client is an interoperable, ultra-flexible, community-driven GraphQL client for JavaScript and native platforms. Its impressive features include a robust state-management tool (Apollo Link), a zero-config caching system, a declarative approach to fetching data, easy-to-implement pagination, and the Optimistic UI for your client-side application.
Apollo Client stores not only the state from the data fetched from the server, but also the state that it has created locally on your client; hence, it manages state for both API data and local data.
It’s also important to note that you can use Apollo Client alongside other state-management tools, like RedUX, without conflict. Plus, it’s possible to migrate your state management from, say, Redux to Apollo Client (which is beyond the scope of this article). Ultimately, the main purpose of Apollo Client is to enable engineers to query data in an API seamlessly.
Features of Apollo Client
Apollo Client has won over so many engineers and companies because of its extremely helpful features that make building modern robust applications a breeze. The following features come baked in:
Caching Apollo Client supports caching on the fly.
Optimistic UI Apollo Client has cool support for the Optimistic UI. It involves temporarily displaying the final state of an operation (mutation) while the operation is in progress. Once the operation is complete, the real data replaces the optimistic data.
Pagination Apollo Client has built-in functionality that makes it quite easy to implement pagination in your application. It takes care of most of the technical headaches of fetching a list of data, either in patches or at once, using the fetchMore function, which comes with the useQuery hook.
In this article, we will look at a selection of these features.
Enough of the theory. Tighten your seat belt and grab a cup of coffee to go with your pancakes, as we get our hands dirty.
Building Our Web App
This project is inspired by Scott Moss.
We will be building a simple pet shop web app, whose features include:
fetching our pets from the server-side;
creating a pet (which involves creating the name, type of pet, and image);
using the Optimistic UI;
using pagination to segment our data.
To begin, clone the repository, ensuring that the starter branch is what you’ve cloned.
Getting Started
Install the Apollo Client Developer Tools extension for Chrome.
Using the command-line interface (CLI), navigate to the directory of the cloned repository, and run the command to get all dependencies: npm install.
Run the command npm run app to start the app.
While still in the root folder, run the command npm run server. This will start our back-end server for us, which we’ll use as we proceed.
The app should open up in a configured port. Mine is http://localhost:1234/; yours is probably something else.
If everything worked well, your app should look like this:
Cloned starter branch UI. (Large preview)
You’ll notice that we’ve got no pets to display. That’s because we haven’t created such functionality yet.
If you’ve installed Apollo Client Developer Tools correctly, open up the developer tools and click on the tray icon. You’ll see “Apollo” and something like this:
Apollo Client Developer Tools. (Large preview)
Like the RedUX and React developer tools, we will be using Apollo Client Developer Tools to write and test our queries and mutations. The extension comes with the GraphQL Playground.
Fetching Pets
Let’s add the functionality that fetches pets. Move over to client/src/client.js. We’ll be writing Apollo Client, linking it to an API, exporting it as a default client, and writing a new query.
Copy the following code and paste it in client.js:
import { ApolloClient } from 'apollo-client' import { InMemoryCache } from 'apollo-cache-inmemory' import { HttpLink } from 'apollo-link-http' const link = new HttpLink({ uri: 'https://localhost:4000/' }) const cache = new InMemoryCache() const client = new ApolloClient({ link, cache }) export default client
Here’s an explanation of what is happening above:
ApolloClient This will be the function that wraps our app and, thus, interfaces with the HTTP, caches the data, and updates the UI.
InMemoryCache This is the normalized data store in Apollo Client that helps with manipulating the cache in our application.
HttpLink This is a standard network interface for modifying the control flow of GraphQL requests and fetching GraphQL results. It acts as middleware, fetching results from the GraphQL server each time the link is fired. Plus, it’s a good substitute for other options, like Axios and window.fetch.
We declare a link variable that is assigned to an instance of HttpLink. It takes a uri property and a value to our server, which is https://localhost:4000/.
Next is a cache variable that holds the new instance of InMemoryCache.
The client variable also takes an instance of ApolloClient and wraps the link and cache.
Lastly, we export the client so that we can use it across the application.
Before we get to see this in action, we’ve got to make sure that our entire app is exposed to Apollo and that our app can receive data fetched from the server and that it can mutate that data.
To achieve this, let’s head over to client/src/index.js:
import React from 'react' import ReactDOM from 'react-dom' import { BrowserRouter } from 'react-router-dom' import { ApolloProvider } from '@apollo/react-hooks' import App from './components/App' import client from './client' import './index.css' const Root = () => ( <BrowserRouter> <ApolloProvider client={client}> <App /> </ApolloProvider> </BrowserRouter> ); ReactDOM.render(<Root />, document.getElementById('app')) if (module.hot) { module.hot.accept() }
As you’ll notice in the highlighted code, we’ve wrapped the App component in ApolloProvider and passed the client as a prop to the client. ApolloProvider is similar to React’s Context.Provider. It wraps your React app and places the client in context, which allows you to access it from anywhere in your component tree.
To fetch our pets from the server, we need to write queries that request the exact fields that we want. Head over to client/src/pages/Pets.js, and copy and paste the following code into it:
import React, {useState} from 'react' import gql from 'graphql-tag' import { useQuery, useMutation } from '@apollo/react-hooks' import PetsList from '../components/PetsList' import NewPetModal from '../components/NewPetModal' import Loader from '../components/Loader' const GET_PETS = gql` query getPets { pets { id name type img } } `; export default function Pets () { const [modal, setModal] = useState(false) const { loading, error, data } = useQuery(GET_PETS); if (loading) return <Loader />; if (error) return <p>An error occured!</p>; const onSubmit = input => { setModal(false) } if (modal) { return <NewPetModal onSubmit={onSubmit} onCancel={() => setModal(false)} /> } return ( <div className="page pets-page"> <section> <div className="row betwee-xs middle-xs"> <div className="col-xs-10"> <h1>Pets</h1> </div> <div className="col-xs-2"> <button onClick={() => setModal(true)}>new pet</button> </div> </div> </section> <section> <PetsList pets={data.pets}/> </section> </div> ) }
With a few bits of code, we are able to fetch the pets from the server.
What Is gql?
It’s important to note that operations in GraphQL are generally JSON objects written with graphql-tag and with backticks.
gql tags are JavaScript template literal tags that parse GraphQL query strings into the GraphQL AST (abstract syntax tree).
Query operations In order to fetch our pets from the server, we need to perform a query operation.
Because we’re making a query operation, we needed to specify the type of operation before naming it.
The name of our query is GET_PETS. It’s a naming convention of GraphQL to use camelCase for field names.
The name of our fields is pets. Hence, we specify the exact fields that we need from the server (id, name, type, img).
useQuery is a React hook that is the basis for executing queries in an Apollo application. To perform a query operation in our React component, we call the useQuery hook, which was initially imported from @apollo/react-hooks. Next, we pass it a GraphQL query string, which is GET_PETS in our case.
When our component renders, useQuery returns an object response from Apollo Client that contains loading, error, and data properties. Thus, they are destructured, so that we can use them to render the UI.
useQuery is awesome. We don’t have to include async-await. It’s already taken care of in the background. Pretty cool, isn’t it?
loading This property helps us handle the loading state of the application. In our case, we return a Loader component while our application loads. By default, loading is false.
error Just in case, we use this property to handle any error that might occur.
data This contains our actual data from the server.
Lastly, in our PetsList component, we pass the pets props, with data.pets as an object value.
At this point, we have successfully queried our server.
To start our application, let’s run the following command:
Start the client app. Run the command npm run app in your CLI.
Start the server. Run the command npm run server in another CLI.
VScode CLI partitioned to start both the client and the server. (Large preview)
If all went well, you should see this:
Pets queried from the server.
Mutating Data
Mutating data or creating data in Apollo Client is almost the same as querying data, with very slight changes.
Still in client/src/pages/Pets.js, let’s copy and paste the highlighted code:
.... const GET_PETS = gql` query getPets { pets { id name type img } } `; const NEW_PETS = gql` mutation CreateAPet($newPet: NewPetInput!) { addPet(input: $newPet) { id name type img } } `; const Pets = () => { const [modal, setModal] = useState(false) const { loading, error, data } = useQuery(GET_PETS); const [createPet, newPet] = useMutation(NEW_PETS); const onSubmit = input => { setModal(false) createPet({ variables: { newPet: input } }); } if (loading || newPet.loading) return <Loader />; if (error || newPet.error) return <p>An error occured</p>; if (modal) { return <NewPetModal onSubmit={onSubmit} onCancel={() => setModal(false)} /> } return ( <div className="page pets-page"> <section> <div className="row betwee-xs middle-xs"> <div className="col-xs-10"> <h1>Pets</h1> </div> <div className="col-xs-2"> <button onClick={() => setModal(true)}>new pet</button> </div> </div> </section> <section> <PetsList pets={data.pets}/> </section> </div> ) } export default Pets
To create a mutation, we would take the following steps.
1. mutation
To create, update, or delete, we need to perform the mutation operation. The mutation operation has a CreateAPet name, with one argument. This argument has a $newPet variable, with a type of NewPetInput. The ! means that the operation is required; thus, GraphQL won’t execute the operation unless we pass a newPet variable whose type is NewPetInput.
2. addPet
The addPet function, which is inside the mutation operation, takes an argument of input and is set to our $newPet variable. The field sets specified in our addPet function must be equal to the field sets in our query. The field sets in our operation are:
id
name
type
img
3. useMutation
The useMutation React hook is the primary API for executing mutations in an Apollo application. When we need to mutate data, we call useMutation in a React component and pass it a GraphQL string (in our case, NEW_PETS).
When our component renders useMutation, it returns a tuple (that is, an ordered set of data constituting a record) in an array that includes:
a mutate function that we can call at any time to execute the mutation;
an object with fields that represent the current status of the mutation’s execution.
The useMutation hook is passed a GraphQL mutation string (which is NEW_PETS in our case). We destructured the tuple, which is the function (createPet) that will mutate the data and the object field (newPets).
4. createPet
In our onSubmit function, shortly after the setModal state, we defined our createPet. This function takes a variable with an object property of a value set to { newPet: input }. The input represents the various input fields in our form (such as name, type, etc.).
With that done, the outcome should look like this:
Mutation without instant update.
If you observe the GIF closely, you’ll notice that our created pet doesn’t show up instantly, only when the page is refreshed. However, it has been updated on the server.
The big question is, why doesn’t our pet update instantly? Let’s find out in the next section.
Caching In Apollo Client
The reason our app doesn’t update automatically is that our newly created data doesn’t match the cache data in Apollo Client. So, there is a conflict as to what exactly it needs to be updated from the cache.
Simply put, if we perform a mutation that updates or deletes multiple entries (a node), then we are responsible for updating any queries referencing that node, so that it modifies our cached data to match the modifications that a mutation makes to our back-end data.
Keeping Cache In Sync
There are a few ways to keep our cache in sync each time we perform a mutation operation.
The first is by refetching matching queries after a mutation, using the refetchQueries object property (the simplest way).
Note: If we were to use this method, it would take an object property in our createPet function called refetchQueries, and it would contain an array of objects with a value of the query: refetchQueries: [{ query: GET_PETS }].
Because our focus in this section isn’t just to update our created pets in the UI, but to manipulate the cache, we won’t be using this method.
The second approach is to use the update function. In Apollo Client, there’s an update helper function that helps modify the cache data, so that it syncs with the modifications that a mutation makes to our back-end data. Using this function, we can read and write to the cache.
Updating The Cache
Copy the following highlighted code, and paste it in client/src/pages/Pets.js:
...... const Pets = () => { const [modal, setModal] = useState(false) const { loading, error, data } = useQuery(GET_PETS); const [createPet, newPet] = useMutation(NEW_PETS, { update(cache, { data: { addPet } }) { const data = cache.readQuery({ query: GET_PETS }); cache.writeQuery({ query: GET_PETS, data: { pets: [addPet, ...data.pets] }, }); }, } ); .....
The update function receives two arguments:
The first argument is the cache from Apollo Client.
The second is the exact mutation response from the server. We destructure the data property and set it to our mutation (addPet).
Next, to update the function, we need to check for what query needs to be updated (in our case, the GET_PETS query) and read the cache.
Secondly, we need to write to the query that was read, so that it knows we’re about to update it. We do so by passing an object that contains a query object property, with the value set to our query operation (GET_PETS), and a data property whose value is a pet object and that has an array of the addPet mutation and a copy of the pet’s data.
If you followed these steps carefully, you should see your pets update automatically as you create them. Let’s take a look at the changes:
Pets updates instantly.
Optimistic UI
A lot of people are big fans of loaders and spinners. There’s nothing wrong with using a loader; there are perfect use cases where a loader is the best option. I’ve written about loaders versus spinners and their best use cases.
Loaders and spinners indeed play an important role in UI and UX design, but the arrival of Optimistic UI has stolen the spotlight.
What Is Optimistic UI?
Optimistic UI is a convention that simulates the results of a mutation (created data) and updates the UI before receiving a response from the server. Once the response is received from the server, the optimistic result is thrown away and replaced with the actual result.
In the end, an optimistic UI is nothing more than a way to manage perceived performance and avoid loading states.
Apollo Client has a very interesting way of integrating the Optimistic UI. It gives us a simple hook that allows us to write to the local cache after mutation. Let’s see how it works!
Step 1
Head over to client/src/client.js, and add only the highlighted code.
import { ApolloClient } from 'apollo-client' import { InMemoryCache } from 'apollo-cache-inmemory' import { HttpLink } from 'apollo-link-http' import { setContext } from 'apollo-link-context' import { ApolloLink } from 'apollo-link' const http = new HttpLink({ uri: "http://localhost:4000/" }); const delay = setContext( request => new Promise((success, fail) => { setTimeout(() => { success() }, 800) }) ) const link = ApolloLink.from([ delay, http ]) const cache = new InMemoryCache() const client = new ApolloClient({ link, cache }) export default client
The first step involves the following:
We import setContext from apollo-link-context. The setContext function takes a callback function and returns a promise whose setTimeout is set to 800ms, in order to create a delay when a mutation operation is performed.
The ApolloLink.from method ensures that the network activity that represents the link (our API) from HTTP is delayed.
Step 2
The next step is using the Optimistic UI hook. Slide back to client/src/pages/Pets.js, and add only the highlighted code below.
..... const Pets = () => { const [modal, setModal] = useState(false) const { loading, error, data } = useQuery(GET_PETS); const [createPet, newPet] = useMutation(NEW_PETS, { update(cache, { data: { addPet } }) { const data = cache.readQuery({ query: GET_PETS }); cache.writeQuery({ query: GET_PETS, data: { pets: [addPet, ...data.pets] }, }); }, } ); const onSubmit = input => { setModal(false) createPet({ variables: { newPet: input }, optimisticResponse: { __typename: 'Mutation', addPet: { __typename: 'Pet', id: Math.floor(Math.random() * 10000 + ''), name: input.name, type: input.type, img: 'https://via.placeholder.com/200' } } }); } .....
The optimisticResponse object is used if we want the UI to update immediately when we create a pet, instead of waiting for the server response.
The code snippets above include the following:
__typename is injected by Apollo into the query to fetch the type of the queried entities. Those types are used by Apollo Client to build the id property (which is a symbol) for caching purposes in apollo-cache. So, __typename is a valid property of the query response.
The mutation is set as the __typename of optimisticResponse.
Just as earlier defined, our mutation’s name is addPet, and the __typename is Pet.
Next are the fields of our mutation that we want the optimistic response to update:
id Because we don’t know what the ID from the server will be, we made one up using Math.floor.
name This value is set to input.name.
type The type’s value is input.type.
img Now, because our server generates images for us, we used a placeholder to mimic our image from the server.
This was indeed a long ride. If you got to the end, don’t hesitate to take a break from your chair with your cup of coffee.
Let’s take a look at our outcome. The supporting repository for this project is on GitHub. Clone and experiment with it.
Final result of our app.
Conclusion
The amazing features of Apollo Client, such as the Optimistic UI and pagination, make building client-side apps a reality.
While Apollo Client works very well with other frameworks, such as Vue.js and Angular, React developers have Apollo Client Hooks, and so they can’t help but enjoy building a great app.
In this article, we’ve only scratched the surface. Mastering Apollo Client demands constant practice. So, go ahead and clone the repository, add pagination, and play around with the other features it offers.
Please do share your feedback and experience in the comments section below. We can also discuss your progress on Twitter. Cheers!
References
(ks, ra, al, yk, il)
Website Design & SEO Delray Beach by DBL07.co
Delray Beach SEO
source http://www.scpie.org/understanding-client-side-graphql-with-apollo-client-in-react-apps/ source https://scpie1.blogspot.com/2020/07/understanding-client-side-graphql-with.html
0 notes
Text
Building a GraphQL interface to Amazon QLDB with AWS AppSync: Part 1
Amazon Quantum Ledger Database (QLDB) is a purpose-built database for use cases that require an authoritative data source. Amazon QLDB maintains a complete, immutable history of all changes committed to the database (referred to as a ledger). Amazon QLDB fits well in finance, eCommerce, inventory, government, and numerous other applications. Pairing Amazon QLDB with services such as AWS AppSync allows you to safely expose data and that data’s history for mobile applications, websites, or a data lake. This post explores a reusable approach for integrating Amazon QLDB with AWS AppSync to power an example government use case. To add Amazon QLDB as a data source for AWS AppSync, you use an AWS Lambda function to connect to the database. The following diagram illustrates the architecture of this solution. For this post, you add Amazon QLDB as a data source to AWS AppSync using a Department of Motor Vehicles (DMV) use case, which is available in Getting Started with the Amazon QLDB Console. In addition to connecting the Amazon QLDB data source, you also write a simple query. A future post to follow explores performing more advanced Amazon QLDB operations, such as mutating data and retrieving history. For information about integrating AWS AppSync with Amazon ElastiCache and Amazon Neptune, see Integrating alternative data sources with AWS AppSync: Amazon Neptune and Amazon ElastiCache. Getting to know AWS AppSync AWS AppSync is a managed service for building data-rich applications using GraphQL. Clients of an AWS AppSync API can select the exact data needed, which allows you to build rich, flexible APIs that can combine data from multiple data sources. AWS AppSync also enables real-time and offline use cases without the need to manage scaling. When building an API in AWS AppSync, you start by defining a GraphQL schema. The schema defines the shape of data types available in your API and the operations that you can perform via that API. GraphQL operations include queries (reading data), mutations (writing data), and subscriptions (receiving real-time updates). Each operation is backed by a data source. AWS AppSync supports a variety of data sources out-of-the-box, including Amazon DynamoDB, Amazon Elasticsearch Service, HTTP endpoints, and Lambda. The flexibility of Lambda functions allows you to create a wide variety of data sources, including for Amazon QLDB. In addition to a data source, each GraphQL operation is associated with a resolver. Resolvers are composed of two mapping templates composed in Apache Velocity Template Language (VTL). The request mapping template defines how AWS AppSync should query or mutate data in the data source; the response template defines how to return the result of the operation to the client. GraphQL operations typically use the JSON data format to communicate with clients. The following diagram illustrates this architecture. The full breadth of functionality in AWS AppSync is beyond the scope of this post. For more information, see in the AWS AppSync Developer Guide. You can also explore AWS Amplify, a development platform for building mobile and web applications, which includes support for AWS AppSync. Building the DMV API in AWS AppSync The first step in constructing a GraphQL API in AWS AppSync is to specify the schema, which defines the shape of data and operations available in the API. The complete code is available on the GitHub repo. For this post, you initially include five GraphQL types and one query in the schema. See the following code: type Person { FirstName: String! LastName: String! DOB: AWSDate GovId: ID! GovIdType: String Address: String } type Owner { PersonId: ID! } type Owners { PrimaryOwner: Person! SecondaryOwners: [Person] } type Vehicle { VIN: ID! Type: String Year: Int Make: String Model: String Color: String } type VehicleRegistration { VIN: ID! LicensePlateNumber: String! State: String City: String PendingPenaltyTicketAmount: Float ValidFromDate: AWSDateTime! ValidToDate: AWSDateTime! Owners: Owners } type Query { getVehicle(vin:ID!): Vehicle } schema { query: Query } If you have experience working with relational databases and SQL, working with Amazon QLDB may feel similar. Like a relational database, Amazon QLDB organizes data in tables. Three of the GraphQL types in the schema map to a table of the same name, with the addition of two types (Owner and Owners) that represent nested data. The sample code for this post deploys both the necessary AWS resources and a small dataset. The Amazon QLDB ledger (similar to a database in relational databases) contains four tables and example data. See the following screenshot. When you review the schema and tables in the ledger, you can see that the types and fields in the schema align closely with the tables and document attributes in the ledger. Querying for Vehicle Data The DMV API currently supports one query to access data: getVehicle. The getVehicle query takes a single parameter, the vehicle identification number (VIN), and returns data about that vehicle. The following code shows the GraphQL query to retrieve information about the 2019 Mercedes CLK 350 in the DMV dataset. GraphQL allows you to specify the fields included in the result (if they’re part of the overall data type). In the following code, the result includes the make, model, and year, but not color and other attributes: query GetVehicle { getVehicle(vin: "1C4RJFAG0FC625797") { Make Model Year } } Each AWS AppSync operation (query or mutation) is associated with a data source and a resolver. Amazon QLDB isn’t directly integrated with AWS AppSync out-of-the-box, but you can use Lambda to enable Amazon QLDB as a data source. Building an Amazon QLDB data source A single integration function manages all interactions between AWS AppSync and Amazon QLDB in the example application, though you may choose to implement in another way. Interacting with Amazon QLDB requires a driver (similar to a relational database, Amazon ElastiCache, or Neptune) that you package in your integration function. The function also needs IAM permission to perform queries on the Amazon QLDB ledger. Amazon QLDB isn’t in an Amazon VPC, though you could also use a Lambda data source to integrate AWS AppSync with a database that’s in a VPC. Amazon QLDB currently offers drivers in Java and previews of Node.js and Python. This post uses Java to build the Amazon QLDB integration function based on its maturity, though Lambda also supports either of the other options. This post also uses AWS Serverless Application Model (SAM) to simplify management of the function and the AWS SAM CLI to build it. To attach the integration function to the AWS AppSync API, you add it as a new Lambda data source that references the function and provide a service role that allows AWS AppSync to invoke the function. For this post, you perform this work in AWS CloudFormation but you can also connect via the AWS CLI and the AWS Management Console. The following code is the applicable portion of the CloudFormation template: QLDBIntegrationDataSource: Type: AWS::AppSync::DataSource Properties: ApiId: !GetAtt DmvApi.ApiId Name: QldbIntegration Description: Lambda function to integrate with QLDB Type: AWS_LAMBDA ServiceRoleArn: !GetAtt AppSyncServiceRole.Arn LambdaConfig: LambdaFunctionArn: !GetAtt QLDBIntegrationFunction.Arn Attaching a resolver After you create the Amazon QLDB data source, you can define the resolver for the getVehicle query. The first part of the resolver is the request mapping, which defines how AWS AppSync interacts with the data source. The request mapping template is defined in JSON and includes a common envelope for all Lambda data sources. For the Amazon QLDB integration function, the payload field includes the specifics of this particular query. See the following code: { "version": "2017-02-28", "operation": "Invoke", "payload": { "action": "Query", "payload": [ { "query": "SELECT * FROM Vehicle AS t WHERE t.VIN = ?", "args": [ "$context.args.vin" ] } ] } } When the getVehicle query is called, AWS AppSync invokes the integration function and passes the contents of the outer payload field as the event. In this use case, AWS AppSync also replaces $ctx.args.vin with the value passed as the vin argument in the query (in the preceding query, the value is 1C4RJFAG0FC625797). The integration function takes an action argument and another payload that contains the actual query. The structure of the invocation payload is flexible, but the invoked Lambda function needs to understand it. For this use case, the integration function expects a payload with the following schema: { "action": "STRING_VALUE", /* required - always "Query" */ "payload": [ { "query": "STRING_VALUE", /* required – PartiQL query */ "args": [ "STRING_VALUE" /* optional – one or more arguments */ ] } /* optional - additional queries (covered in subsequent post) */ ] } If you’re familiar with SQL, the query included in the preceding request mapping should be familiar. For this use case, you query for all attributes in the Vehicle table where the VIN attribute is some value. The value of the VIN argument is passed from AWS AppSync in the $context variable available to the resolver. For this use case, AWS AppSync transforms the variable to the actual value before invoking the Lambda function. For more information about resolver mapping templates, see Resolver Mapping Template Context Reference. You can test this query yourself using the Query Editor in the Amazon QLDB console and replace the question mark with a valid VIN in the ledger. See the following screenshot. Exploring the Amazon QLDB integration function After transforming the getVehicle request mapping template, AWS AppSync invokes the Amazon QLDB integration function. This section explores the implementation of the function. Connecting to Amazon QLDB Before you can execute queries on the ledger, you need to establish a connection to it. The integration function uses PooledQldbDriver, which is an Amazon QLDB best practice. For more information about best practices, see What is Amazon QLDB? For more information about the driver, see Amazon QLDB Java Driver 1.1.0 API Reference on the Javadocs website. In the Lambda function, the driver is initialized in a static code block so that it isn’t created on every invocation. This is a Lambda best practice because creating the connection is a relatively slow process. To instantiate a connection, use the builder object provided by the PooledQldbDriver class, passing the name of the ledger. The ledger is named vehicle-registration; that name is passed via a Lambda environment variable (QLDB_LEDGER). See the following code: private static PooledQldbDriver createQLDBDriver() { AmazonQLDBSessionClientBuilder builder = AmazonQLDBSessionClientBuilder.standard(); return PooledQldbDriver.builder() .withLedger(System.getenv("QLDB_LEDGER")) .withRetryLimit(3) .withSessionClientBuilder(builder) .build(); } As mentioned earlier, Amazon QLDB doesn’t require a VPC but a caller needs IAM permission to execute queries for the particular ledger. An IAM policy such as the following grants the Lambda function appropriate access to Amazon QLDB: { "Version": "2012-10-17", "Statement": [ { "Action": [ "qldb:SendCommand" ], "Resource": "arn:aws:qldb:REGION:ACCOUNT_ID:ledger/vehicle-registration", "Effect": "Allow" } ] } Executing a query To transact with Amazon QLDB, you need to create a session via the driver. The integration function creates a new session on each invocation of the Lambda function. See the following code: private QldbSession createQldbSession() { return DRIVER.getSession(); } With a session, you can begin to interact with the Amazon QLDB ledger. Amazon QLDB supports the PartiQL query language, which provides SQL-compatible query access across structured, semi-structured, and nested data. You can run multiple queries within a single transaction. To promote reusability, the Amazon QLDB integration function allows multiple queries in a single AWS AppSync query or mutation. This post focuses single query operations, but a later post discusses how to use multiple Amazon QLDB queries for more complex transactions. To run a query on Amazon QLDB, create a transaction and execute each query of interest. See the following code: private String executeTransaction(Query query) { try (QldbSession qldbSession = createQldbSession()) { String result = ""; qldbSession.execute((ExecutorNoReturn) txn -> { result = executeQuery(txn, query)); }, (retryAttempt) -> LOGGER.info("Retrying due to OCC conflict...")); return result; } catch (QldbClientException e) { LOGGER.error("Unable to create QLDB session: {}", e.getMessage()); } return "{}"; } private String executeQuery(TransactionExecutor txn, Query query) { final List params = new ArrayList(); query.getArgs().forEach((a) -> { try { params.add(MAPPER.writeValueAsIonValue(arg)); } catch (IOException e) { LOGGER.error("Could not write value as Ion: {}", a); } }); // Execute the query and transform response to JSON string... List json = new ArrayList(); txn.execute(query.getQuery(), params).iterator().forEachRemaining(r -> { String j = convertToJson(r.toPrettyString()); json.add(j); }); return json.toString(); } Query results are returned from Amazon QLDB in Amazon ION, which is an extension of JSON. AWS AppSync, however, requires that data to be passed in JSON format. You can convert from ION to JSON with a derivation of an ION Cookbook recipe. See the following code: rivate String convertToJson(String ionText) { StringBuilder builder = new StringBuilder(); try (IonWriter jsonWriter = IonTextWriterBuilder.json() .withPrettyPrinting().build(builder)) { IonReader reader = IonReaderBuilder.standard().build(ionText); jsonWriter.writeValues(reader); } catch (IOException e) { LOGGER.error(e.getMessage()); } return builder.toString(); } A future post covers further details of the Lambda function. For more information, see the GitHub repo. Results from the Amazon QLDB function are returned as part of a JSON response. The actual result from Amazon QLDB is string-encoded when returned from the function. See the following code: "result": { "result": "[n{n "VIN":"1C4RJFAG0FC625797",n "Type":"Sedan",n "Year":2019,n "Make":"Mercedes",n "Model":"CLK 350",n "Color":"White"n}]", "success": true } Resolving the Result Before it returns the result to the caller, AWS AppSync applies the second part of the resolver, which is the response mapping template. Like the request to the data source, the response to the caller is the result of the transformation of the response template. AWS AppSync makes the result of calling the data source available in the same $context object as the query parameters discussed earlier. For this case, the result is found in the result field specifically. To map the result from Amazon QLDB to a valid AWS AppSync result, the mapping template uses a built-in utility function to parse the “stringified” JSON result from the integration function and returns the first result as a JSON object. The following code is a simplified version of the getVehicle response mapping template: #set( $result = $util.parseJson($ctx.result.result) ) $util.toJson($result[0]) Because you can uniquely tie resolvers to AWS AppSync operations, the request and response mapping templates provide quite a bit of flexibility based on the use case. For this post, you can expect only a single result (or an error). Other operations may return an array of results or some other response; you can customize these via the mapping template. The following code is the result of your original getVehicle query. The shape of the result is a subset of the Vehicle type in your schema, based on the fields selected in the request: { "data": { "getVehicle": { "Make": "Mercedes", "Model": "CLK 350", "Year": 2019 } } } Conclusion This post walked you through using AWS AppSync, Lambda, and Amazon QLDB to perform a relatively straightforward query. To implement the getVehicle query, you authored an AWS AppSync resolver, attached a Lambda integration function, and queried Amazon QLDB. You can take advantage of the inherent benefits of Amazon QLDB and AWS AppSync by integrating them. You can use the managed ledger from Amazon QLDB for use cases that require a verifiable transaction log and interact with the ledger from a variety of clients via AWS AppSync. Visit Building a GraphQL interface to Amazon QLDB with AWS AppSync: Part 2, where I expand on the capabilities of the DMV API, including multi-step queries, mutations, and querying for data changes in the ledger. For a complete working example, see the GitHub repo. About the Author Josh Kahn is a Principal Solutions Architect at Amazon Web Services. He works with the AWS customers to provide guidance and technical assistance on database projects, helping them improve the value of their solutions when using AWS. https://probdm.com/site/MjE0MTY
0 notes
Text
[GraphQL là gì?] Thông tin về nền tảng công nghệ mới hiện nay!
1. GraphQL là gì? “GraphQL” có thể hiểu chính là một cú pháp để thể hiện hay mô tả về cách để yêu cầu lấy các thông tin, dữ liệu và thông thường sẽ được dùng để load các data từ một server cho client nào đó. GraphQL bao gồm có 3 đặc điểm chính là: - Cho phép các client có thể xác định được một cách chính xác nhất về toàn bộ những dữ liệu cần thiết. - GraphQL giúp cho việc tổng hợp được những dữ liệu quan trọng từ nhiều nguồn cung cấp khác nhau một cách dễ dàng, nhanh chóng. - GraphQL sử dụng một type system để có thể mô tả cụ thể về các dữ liệu, thông tin. GraphQL là gì? GraphQL bắt đầu xuất hiện từ ông lơn Facebook, tuy nhiên đối với cả những app dù đơn giản nhất đều có thể sẽ xảy ra vấn đề do sự hạn chế của REST APIs. Một ví dụ dễ hiểu nhất như khi bạn muốn hiển thị một list posts nào đó và ở dưới mỗi post sẽ có một list like, trong đó bao gồm cả tên của người sử dụng kèm theo avatar của họ thì cách giải quyết nhanh chóng và dễ dàng nhất chính là làm sao để thay đổi được API của posts đó để nó có thể bao gồm được “a like array” và chứa đựng các thông tin của người dùng. Tuy nhiên nếu như làm theo cách đó và áp dụng với ác app mobile thì chắc chắn bạn sẽ thấy tốc độ của chúng là quá chậm và thậm chí là nếu như các posts được lưu trữ ở một MySQL database thì likes lại chỉ được lưu tại Redis store. Chính vì những vấn đề trên mà Facebook đã đưa ra được ý tưởng khá mới lạ trở thành giải pháp cho những khúc mắc này, chính là sự ra đời của GraphQL. Thay vì việc phải có quá nhiều những endpoint không cần thiết thì tại sao lại không sử dụng duy nhất một endpoint thông minh với những khả năng tiếp thu toàn bộ những Query phức tạp và sau đó đưa ra output data cùng với các loại type theo yêu cầu của client? Thực tế có thể thấy, GraphQL giống như một layer và nằm ở giữa của client và data source. Sau khi đã tiếp nhận yêu cầu của client thì GraphQL sẽ tiến hành tìm kiếm các thông tin từ các data source rồi đưa lại cho các client theo như format mà họ muốn và định sẵn từ ban đầu. 2. Những tính năng vượt trội của GraphQL 2.1. GraphQL có thể thay thế cho REST Có thể thấy, vấn đề mà REST hiện đang gặp phải chính là phản hồi các dữ liệu của nó trả về quá nhiều, có đôi khi là quá ít. Và đối với các hai trường hợp này thì đều sẽ ảnh hưởng khá nhiều đến hiệu suất của các ứng dụng. Do đó, giải pháp tối ưu nhất đưa ra ở đây chính là sử dụng GraphQL thay thế cho REST. GraphQL có thể cho phép việc khai báo các thông tin, dữ liệu ở những nơi mà client có thể xác định được một cách chính xác nhất những điều mà họ cần từ một API. Đây được xem là một tính năng vượt trội và hữu ích cũng như góp phần tăng hiệu suất của các ứng dụng. GraphQL có thể thay thế cho REST 2.2. Tính năng về Defining schema and Type system Hiện nay, GraphQL đã có riêng một hệ thống dành cho việc sử dụng để xác định các schema của một API nhất định. Và tất cả những type của hệ thống khi được liệt kê trong một API nhất định nào đó thì sẽ được viết cụ thể ở trong các schema và sẽ sử dụng GraphQL Schema Definition Language để thực hiện toàn bộ những hoạt động, thao tác cần thiết cho các ứng dụng. Schema được áp dụng giống như một bản giao dịch cụ thể giữa client và các server để từ đó GraphQL có thể xác định được các client và truy cập các thông tin, dữ liệu. Sau khi thực hiện thì team frontend có thể mock data và kiểm tra kỹ lưỡng các component. Đồng thời, team back – end cũng sẽ chuẩn bị các công việc, hoạt động cần thiết nhất cho server. Như vậy, đây được xem là một tính năng vô cùng hữu ích của GraphQL đối với hệ thống xử lý dữ liệu và góp phần chạy các ứng dụng một cách nhanh chóng, hiệu quả hơn. 2.3. Tính năng về Fetching data – Query GraphQL có thể sử dụng để nạp các thông tin, dữ liệu khác với REST là chỉ có duy nhất một single endpoint và hoàn toàn phải phụ thuộc vào client để có thể xác định được các dữ liệu quan trọng, cần thiết. Chính vì vậy, GraphQL phát triển và mang đến một tính năng mới về Fetching data (hay còn gọi là Query) để khắc phục được những hạn chế, đồng thời phát huy được những ưu điểm để phát triển toàn diện hơn hệ thống hoạt động cho các ứng dụng hiện nay. 2.4. Tính năng về Mutations GraphQL có tính năng giúp gửi các queries và được gọi là mutations. Những mutation này bao gồm có 3 loại chính là UPDATE, DELETE và CREATE. Mutation cũng có những cú pháp tương tự như Fetching Data, tuy nhiên lại luôn bắt đầu với một từ khóa nhất định nào đó. Đây cũng là một tính năng khá hữu ích giúp cho hệ thống xử lý và phân tích dữ liệu hoạt động hiệu quả và mang đến năng suất cao hơn cho các ứng dụng khi đang chạy. 2.5. Tính năng về Subscription and Realtime updates Tính năng về Subscription and Realtime updates Trong các ứng dụng hiện nay đều có một yêu cầu khá quan trọng chính là realtime để thực hiện chức năng kết nối đến các máy chủ và có được thông tin cho các event một cách nhanh chóng. Và trong những trường hợp đặc biệt này thì GraphQL sẽ mang đến những khái niệm, thông tin liên quan và tất cả được gọi là subscriptions. Điều đó đồng nghĩa với việc khi một client subscriptions một event thì nó cũng sẽ bắt đầu giữ các kết nối đến với server. Như vậy, bất cứ khi nào có sự kiện diễn ra thì server sẽ tự động đẩy dữ liệu tương ứng đến với client. Khác hoàn toàn so với Query hay Mutation, subscriptions sẽ đi theo kiểu “request – response – cycle và sẽ subscriptions đại diện của từng luồng dữ liệu được đưa đến client. 3. Những yếu tố chính tạo ra GraphQL 3.1. Yếu tố Query Tất cả những yêu cầu mà bạn đặt ra cho GraphQL được gọi là “Query” và khi tuyên bố một “query” mới có sử dụng keyword “query”, đặt tên cho field đó là stuff. Điều đặc biệt có thể thấy ở GraphQL chính là query được phép support cho các nested fields trong toàn bộ hệ thống của ứng dụng. Do đó, các client khi đã đưa ra những yêu cầu và tạo ra query sẽ không cần phải lo đến việc data đến từ các source nào cả mà chỉ cần hỏi cũng như GraphQL server sẽ đảm nhiệm và lo hết toàn bộ mọi thứ. Một điều cũng hết sức đáng lưu ý ở đây chính là các query field còn có thể chỉ đến các array và query field còn có khả năng support cả các argument. Chính vì những điều đó, nếu như bạn muốn được đưa ra một post riêng biệt nào đó cho mình thì đơn giản là chỉ cần lựa chọn thêm các “id argument” cho các post field mà mình đã xác định từ ban đầu là được. Query - một trong những yếu tố tạo thành GraphQL Và cuối cùng, nếu như bạn vẫn có ý muốn khiến cho các “id argument” được trở nên đặc biệt và khác lạ hơn thì cũng có thể thay đổi và tạo ra một variable hoặc là tái sử dụng chúng ở phía bên trong của query. Một trong những cách để thực hiện khá tốt điều này chính là áp dụng “GitHub’s GraphQL API Explorer. Đó là việc bạn có thể dễ dàng và nhanh chóng thử đặt tên cho bất kỳ một field nào đó ở phía dưới của description, khi đó IDE sẽ có thể tự động cũng như gợi ý cho bạn những cái tên mới của field đã có sẵn hay là đã được tạo ra từ chính GraphQL API trong hệ thống ứng dụng. 3.2. Yếu tố Resolvers Một yếu tố tuyệt đối không thể thiếu khi tạo ra GraphQL chính là Resolvers bởi thực tế GraphQL chắc chắn sẽ không biết cần phải làm gì đối với query mà bạn đưa ra nếu như không có resolver. Resolver giúp cho GraphQL có thể biết được địa điểm cũng như cách để lấy các data cần thiết nhất cho các field của query mà bạn đã yêu cầu. Mặc dù bạn đã đặt resolver ngay tại các query để có thể query cho các post nhanh chóng, tuy nhiên, bạn vẫn có thể thoải mái sử dụng resolver trong sub – field như là author field của post. Và một điều bạn cần phải hết sức quan tâm và lưu ý chính là resolver sẽ tuyệt đối không bị giới hạn hay ảnh hưởng bởi tất cả những thông tin, dữ liệu thu thập được, do đó rất có thể bạn sẽ muốn được thêm vào các commentscount cho post type của mình để hoàn thiện hệ thống ứng dụng hơn. Một điều khá quan trọng ở đây chính là đối với GraphQL, API schema hay database schema sẽ tách ra riêng biệt. Hiểu đơn giản chính là nó sẽ không có bất kỳ một author hay commentscount nào ở trong database, tuy nhiên bạn vẫn có thể mô phỏng được chúng nhờ có resolver và cũng có thể viết bất kỳ code gì trong đó. Do vậy mà bạn có thể sử dụng resolver để sửa những nội dung của database hay còn được gọi với cái tên khác là mutation resolver. 3.3. Yếu tố Schema Schema - yếu tố không thể thiếu để tạo thành GraphQL Schema là một trong ba yếu tố quan trọng không thể thiếu đối với quá trình tạo ra GraphQL bởi toàn bộ những điều thú vị, cần thiết nhất đều phải nhờ vào hệ thống của GraphQL’s typed schema. GraphQL sẽ sử dụng một hệ thống nằm trong strong type để có thể định nghĩa được khả năng của API và tất cả những kiểu dữ liệu trong API cũng sẽ được định nghĩa bởi một schema thông qua SDL của GraphQL. Do đó, schema có vai trò quan trọng để quy ước những client và server để có thể xác định được chính xác cách mà một client có thể truy cập vào các thông tin, dữ liệu. Khái niệm GraphQL là gì có lẽ sẽ khá phức tạp và khó hiểu đối với những người mới tiếp xúc. Tuy nhiên, nếu bạn có thể kiên trì học hỏi, tìm hiểu thì chắc chắn sẽ nhận ra được nhiều điều thú vị ẩn sâu bên trong. Hy vọng với những chia sẻ trên đây của Timviec365.vn, các bạn sẽ hiểu và nắm rõ hơn về GraphQL là gì cũng các thông tin có liên quan đến GraphQL. Từ đó biết cách để áp dụng vào công việc, nhất là đối với các web developer hiện nay.
Coi thêm tại: [GraphQL là gì?] Thông tin về nền tảng công nghệ mới hiện nay!
#timviec365vn
0 notes
Text
Rendering the WordPress philosophy in GraphQL
WordPress is a CMS that’s coded in PHP. But, even though PHP is the foundation, WordPress also holds a philosophy where user needs are prioritized over developer convenience. That philosophy establishes an implicit contract between the developers building WordPress themes and plugins, and the user managing a WordPress site.
GraphQL is an interface that retrieves data from—and can submit data to—the server. A GraphQL server can have its own opinionatedness in how it implements the GraphQL spec, as to prioritize some certain behavior over another.
Can the WordPress philosophy that depends on server-side architecture co-exist with a JavaScript-based query language that passes data via an API?
Let’s pick that question apart, and explain how the GraphQL API WordPress plugin I authored establishes a bridge between the two architectures.
You may be aware of WPGraphQL. The plugin GraphQL API for WordPress (or “GraphQL API” from now on) is a different GraphQL server for WordPress, with different features.
Reconciling the WordPress philosophy within the GraphQL service
This table contains the expected behavior of a WordPress application or plugin, and how it can be interpreted by a GraphQL service running on WordPress:
CategoryWordPress app expected behaviorInterpretation for GraphQL service running on WordPressAccessing dataDemocratizing publishing: Any user (irrespective of having technical skills or not) must be able to use the softwareDemocratizing data access and publishing: Any user (irrespective of having technical skills or not) must be able to visualize and modify the GraphQL schema, and execute a GraphQL queryExtensibilityThe application must be extensible through pluginsThe GraphQL schema must be extensible through pluginsDynamic behaviorThe behavior of the application can be modified through hooksThe results from resolving a query can be modified through directivesLocalizationThe application must be localized, to be used by people from any region, speaking any languageThe GraphQL schema must be localized, to be used by people from any region, speaking any languageUser interfacesInstalling and operating functionality must be done through a user interface, resorting to code as little as possibleAdding new entities (types, fields, directives) to the GraphQL schema, configuring them, executing queries, and defining permissions to access the service must be done through a user interface, resorting to code as little as possibleAccess controlAccess to functionalities can be granted through user roles and permissionsAccess to the GraphQL schema can be granted through user roles and permissionsPreventing conflictsDevelopers do not know in advance who will use their plugins, or what configuration/environment those sites will run, meaning the plugin must be prepared for conflicts (such as having two plugins define the SMTP service), and attempt to prevent them, as much as possibleDevelopers do not know in advance who will access and modify the GraphQL schema, or what configuration/environment those sites will run, meaning the plugin must be prepared for conflicts (such as having two plugins with the same name for a type in the GraphQL schema), and attempt to prevent them, as much as possible
Let’s see how the GraphQL API carries out these ideas.
Accessing data
Similar to REST, a GraphQL service must be coded through PHP functions. Who will do this, and how?
Altering the GraphQL schema through code
The GraphQL schema includes types, fields and directives. These are dealt with through resolvers, which are pieces of PHP code. Who should create these resolvers?
The best strategy is for the GraphQL API to already satisfy the basic GraphQL schema with all known entities in WordPress (including posts, users, comments, categories, and tags), and make it simple to introduce new resolvers, for instance for Custom Post Types (CPTs).
This is how the user entity is already provided by the plugin. The User type is provided through this code:
class UserTypeResolver extends AbstractTypeResolver { public function getTypeName(): string { return 'User'; } public function getSchemaTypeDescription(): ?string { return __('Representation of a user', 'users'); } public function getID(object $user) { return $user->ID; } public function getTypeDataLoaderClass(): string { return UserTypeDataLoader::class; } }
The type resolver does not directly load the objects from the database, but instead delegates this task to a TypeDataLoader object (in the example above, from UserTypeDataLoader. This decoupling is to follow the SOLID principles, providing different entities to tackle different responsibilities, as to make the code maintainable, extensible and understandable.
Adding username, email and url fields to the User type is done via a FieldResolver object:
class UserFieldResolver extends AbstractDBDataFieldResolver { public static function getClassesToAttachTo(): array { return [ UserTypeResolver::class, ]; } public static function getFieldNamesToResolve(): array { return [ 'username', 'email', 'url', ]; } public function getSchemaFieldDescription( TypeResolverInterface $typeResolver, string $fieldName ): ?string { $descriptions = [ 'username' => __("User's username handle", "graphql-api"), 'email' => __("User's email", "graphql-api"), 'url' => __("URL of the user's profile in the website", "graphql-api"), ]; return $descriptions[$fieldName]; } public function getSchemaFieldType( TypeResolverInterface $typeResolver, string $fieldName ): ?string { $types = [ 'username' => SchemaDefinition::TYPE_STRING, 'email' => SchemaDefinition::TYPE_EMAIL, 'url' => SchemaDefinition::TYPE_URL, ]; return $types[$fieldName]; } public function resolveValue( TypeResolverInterface $typeResolver, object $user, string $fieldName, array $fieldArgs = [] ) { switch ($fieldName) { case 'username': return $user->user_login; case 'email': return $user->user_email; case 'url': return get_author_posts_url($user->ID); } return null; } }
As it can be observed, the definition of a field for the GraphQL schema, and its resolution, has been split into a multitude of functions:
getSchemaFieldDescription
getSchemaFieldType
resolveValue
Other functions include:
getSchemaFieldArgs: to declare the field arguments (including their name, description, type, and if they are mandatory or not)
isSchemaFieldResponseNonNullable: to indicate if a field is non-nullable
getImplementedInterfaceClasses: to define the resolvers for interfaces implemented by the fields
resolveFieldTypeResolverClass: to define the type resolver when the field is a connection
resolveFieldMutationResolverClass: to define the resolver when the field executes mutations
This code is more legible than if all functionality is satisfied through a single function, or through a configuration array, thus making it easier to implement and maintain the resolvers.
Retrieving plugin or custom CPT data
What happens when a plugin has not integrated its data to the GraphQL schema by creating new type and field resolvers? Could the user then query data from this plugin through GraphQL? For instance, let’s say that WooCommerce has a CPT for products, but it does not introduce the corresponding Product type to the GraphQL schema. Is it possible to retrieve the product data?
Concerning CPT entities, their data can be fetched via type GenericCustomPost, which acts as a kind of wildcard, to encompass any custom post type installed in the site. The records are retrieved by querying Root.genericCustomPosts(customPostTypes: [cpt1, cpt2, ...]) (in this notation for fields, Root is the type, and genericCustomPosts is the field).
Then, to fetch the product data, corresponding to CPT with name "wc_product", we execute this query:
{ genericCustomPosts(customPostTypes: "[wc_product]") { id title url date } }
However, all the available fields are only those ones present in every CPT entity: title, url, date, etc. If the CPT for a product has data for price, a corresponding field price is not available. wc_product refers to a CPT created by the WooCommerce plugin, so for that, either the WooCommerce or the website’s developers will have to implement the Product type, and define its own custom fields.
CPTs are often used to manage private data, which must not be exposed through the API. For this reason, the GraphQL API initially only exposes the Page type, and requires defining which other CPTs can have their data publicly queried:

Transitioning from REST to GraphQL via persisted queries
While GraphQL is provided as a plugin, WordPress has built-in support for REST, through the WP REST API. In some circumstances, developers working with the WP REST API may find it problematic to transition to GraphQL. For instance, consider these differences:
A REST endpoint has its own URL, and can be queried via GET, while GraphQL, normally operates through a single endpoint, queried via POST only
The REST endpoint can be cached on the server-side (when queried via GET), while the GraphQL endpoint normally cannot
As a consequence, REST provides better out-of-the-box support for caching, making the application more performant and reducing the load on the server. GraphQL, instead, places more emphasis in caching on the client-side, as supported by the Apollo client.
After switching from REST to GraphQL, will the developer need to re-architect the application on the client-side, introducing the Apollo client just to introduce a layer of caching? That would be regrettable.
The “persisted queries” feature provides a solution for this situation. Persisted queries combine REST and GraphQL together, allowing us to:
create queries using GraphQL, and
publish the queries on their own URL, similar to REST endpoints.
The persisted query endpoint has the same behavior as a REST endpoint: it can be accessed via GET, and it can be cached server-side. But it was created using the GraphQL syntax, and the exposed data has no under/over fetching.
vimeo
Extensibility
The architecture of the GraphQL API will define how easy it is to add our own extensions.
Decoupling type and field resolvers
The GraphQL API uses the Publish-subscribe pattern to have fields be “subscribed” to types.
Reappraising the field resolver from earlier on:
class UserFieldResolver extends AbstractDBDataFieldResolver { public static function getClassesToAttachTo(): array { return [UserTypeResolver::class]; } public static function getFieldNamesToResolve(): array { return [ 'username', 'email', 'url', ]; } }
The User type does not know in advance which fields it will satisfy, but these (username, email and url) are instead injected to the type by the field resolver.
This way, the GraphQL schema becomes easily extensible. By simply adding a field resolver, any plugin can add new fields to an existing type (such as WooCommerce adding a field for User.shippingAddress), or override how a field is resolved (such as redefining User.url to return the user’s website instead).
Code-first approach
Plugins must be able to extend the GraphQL schema. For instance, they could make available a new Product type, add an additional coauthors field on the Post type, provide a @sendEmail directive, or anything else.
To achieve this, the GraphQL API follows a code-first approach, in which the schema is generated from PHP code, on runtime.
The alternative approach, called SDL-first (Schema Definition Language), requires the schema be provided in advance, for instance, through some .gql file.
The main difference between these two approaches is that, in the code-first approach, the GraphQL schema is dynamic, adaptable to different users or applications. This suits WordPress, where a single site could power several applications (such as website and mobile app) and be customized for different clients. The GraphQL API makes this behavior explicit through the “custom endpoints” feature, which enables to create different endpoints, with access to different GraphQL schemas, for different users or applications.
To avoid performance hits, the schema is made static by caching it to disk or memory, and it is re-generated whenever a new plugin extending the schema is installed, or when the admin updates the settings.
Support for novel features
Another benefit of using the code-first approach is that it enables us to provide brand-new features that can be opted into, before these are supported by the GraphQL spec.
For instance, nested mutations have been requested for the spec but not yet approved. The GraphQL API complies with the spec, using types QueryRoot and MutationRoot to deal with queries and mutations respectively, as exposed in the standard schema. However, by enabling the opt-in “nested mutations” feature, the schema is transformed, and both queries and mutations will instead be handled by a single Root type, providing support for nested mutations.
Let’s see this novel feature in action. In this query, we first query the post through Root.post, then execute mutation Post.addComment on it and obtain the created comment object, and finally execute mutation Comment.reply on it and query some of its data (uncomment the first mutation to log the user in, as to be allowed to add comments):
# mutation { # loginUser( # usernameOrEmail:"test", # password:"pass" # ) { # id # name # } # } mutation { post(id:1459) { id title addComment(comment:"That's really beautiful!") { id date content author { id name } reply(comment:"Yes, it is!") { id date content } } } }
Dynamic behavior
WordPress uses hooks (filters and actions) to modify behavior. Hooks are simple pieces of code that can override a value, or enable to execute a custom action, whenever triggered.
Is there an equivalent in GraphQL?
Directives to override functionality
Searching for a similar mechanism for GraphQL, I‘ve come to the conclusion that directives could be considered the equivalent to WordPress hooks to some extent: like a filter hook, a directive is a function that modifies the value of a field, thus augmenting some other functionality. For instance, let’s say we retrieve a list of post titles with this query:
query { posts { title } }
…which produces this response:
{ "data": { "posts": [ { "title": "Scheduled by Leo" }, { "title": "COPE with WordPress: Post demo containing plenty of blocks" }, { "title": "A lovely tango, not with leo" }, { "title": "Hello world!" }, ] } }
These results are in English. How can we translate them to Spanish? With a directive @translate applied on field title (implemented through this directive resolver), which gets the value of the field as an input, calls the Google Translate API to translate it, and has its result override the original input, as in this query:
query { posts { title @translate(from:"en", to"es") } }
…which produces this response:
{ "data": { "posts": [ { "title": "Programado por Leo" }, { "title": "COPE con WordPress: publica una demostración que contiene muchos bloques" }, { "title": "Un tango lindo, no con leo" }, { "title": "¡Hola Mundo!" } ] } }
Please notice how directives are unconcerned with who the input is. In this case, it was a Post.title field, but it could’ve been Post.excerpt, Comment.content, or any other field of type String. Then, resolving fields and overriding their value is cleanly decoupled, and directives are always reusable.
Directives to connect to third parties
As WordPress keeps steadily becoming the OS of the web (currently powering 39% of all sites, more than any other software), it also progressively increases its interactions with external services (think of Stripe for payments, Slack for notifications, AWS S3 for hosting assets, and others).
As we‘ve seen above, directives can be used to override the response of a field. But where does the new value come from? It could come from some local function, but it could perfectly well also originate from some external service (as for directive @translate we’ve seen earlier on, which retrieves the new value from the Google Translate API).
For this reason, GraphQL API has decided to make it easy for directives to communicate with external APIs, enabling those services to transform the data from the WordPress site when executing a query, such as for:
translation,
image compression,
sourcing through a CDN, and
sending emails, SMS and Slack notifications.
As a matter of fact, GraphQL API has decided to make directives as powerful as possible, by making them low-level components in the server’s architecture, even having the query resolution itself be based on a directive pipeline. This grants directives the power to perform authorizations, validations, and modification of the response, among others.
Localization
GraphQL servers using the SDL-first approach find it difficult to localize the information in the schema (the corresponding issue for the spec was created more than four years ago, and still has no resolution).
Using the code-first approach, though, the GraphQL API can localize the descriptions in a straightforward manner, through the __('some text', 'domain') PHP function, and the localized strings will be retrieved from a POT file corresponding to the region and language selected in the WordPress admin.
For instance, as we saw earlier on, this code localizes the field descriptions:
class UserFieldResolver extends AbstractDBDataFieldResolver { public function getSchemaFieldDescription( TypeResolverInterface $typeResolver, string $fieldName ): ?string { $descriptions = [ 'username' => __("User's username handle", "graphql-api"), 'email' => __("User's email", "graphql-api"), 'url' => __("URL of the user's profile in the website", "graphql-api"), ]; return $descriptions[$fieldName]; } }
User interfaces
The GraphQL ecosystem is filled with open source tools to interact with the service, including many provide the same user-friendly experience expected in WordPress.
Visualizing the GraphQL schema is done with GraphQL Voyager:

This can prove particularly useful when creating our own CPTs, and checking out how and from where they can be accessed, and what data is exposed for them:

Executing the query against the GraphQL endpoint is done with GraphiQL:

However, this tool is not simple enough for everyone, since the user must have knowledge of the GraphQL query syntax. So, in addition, the GraphiQL Explorer is installed on top of it, as to compose the GraphQL query by clicking on fields:

Access control
WordPress provides different user roles (admin, editor, author, contributor and subscriber) to manage user permissions, and users can be logged-in the wp-admin (eg: the staff), logged-in the public-facing site (eg: clients), or not logged-in or have an account (any visitor). The GraphQL API must account for these, allowing to grant granular access to different users.
Granting access to the tools
The GraphQL API allows to configure who has access to the GraphiQL and Voyager clients to visualize the schema and execute queries against it:
Only the admin?
The staff?
The clients?
Openly accessible to everyone?
For security reasons, the plugin, by default, only provides access to the admin, and does not openly expose the service on the Internet.
In the images from the previous section, the GraphiQL and Voyager clients are available in the wp-admin, available to the admin user only. The admin user can grant access to users with other roles (editor, author, contributor) through the settings:

As to grant access to our clients, or anyone on the open Internet, we don’t want to give them access to the WordPress admin. Then, the settings enable to expose the tools under a new, public-facing URL (such as mywebsite.com/graphiql and mywebsite.com/graphql-interactive). Exposing these public URLs is an opt-in choice, explicitly set by the admin.

Granting access to the GraphQL schema
The WP REST API does not make it easy to customize who has access to some endpoint or field within an endpoint, since no user interface is provided and it must be accomplished through code.
The GraphQL API, instead, makes use of the metadata already available in the GraphQL schema to enable configuration of the service through a user interface (powered by the WordPress editor). As a result, non-technical users can also manage their APIs without touching a line of code.
Managing access control to the different fields (and directives) from the schema is accomplished by clicking on them and selecting, from a dropdown, which users (like those logged in or with specific capabilities) can access them.

Preventing conflicts
Namespacing helps avoid conflicts whenever two plugins use the same name for their types. For instance, if both WooCommerce and Easy Digital Downloads implement a type named Product, it would become ambiguous to execute a query to fetch products. Then, namespacing would transform the type names to WooCommerceProduct and EDDProduct, resolving the conflict.
The likelihood of such conflict arising, though, is not very high. So the best strategy is to have it disabled by default (as to keep the schema as simple as possible), and enable it only if needed.
If enabled, the GraphQL server automatically namespaces types using the corresponding PHP package name (for which all packages follow the PHP Standard Recommendation PSR-4). For instance, for this regular GraphQL schema:
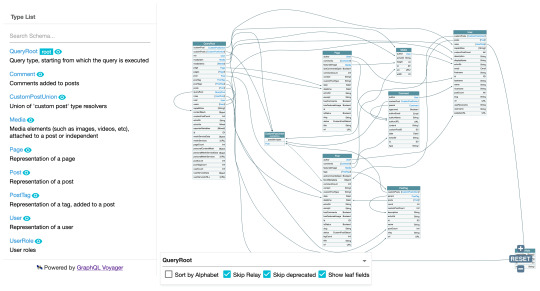
…with namespacing enabled, Post becomes PoPSchema_Posts_Post, Comment becomes PoPSchema_Comments_Comment, and so on.
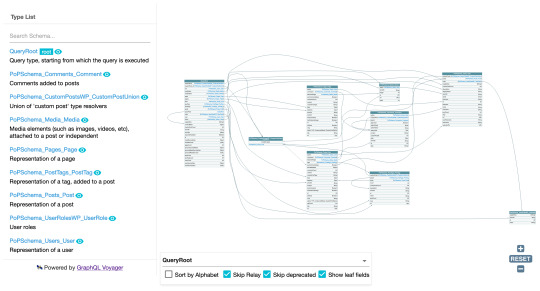
That’s all, folks
Both WordPress and GraphQL are captivating topics on their own, so I find the integration of WordPress and GraphQL greatly endearing. Having been at it for a few years now, I can say that designing the optimal way to have an old CMS manage content, and a new interface access it, is a challenge worth pursuing.
I could continue describing how the WordPress philosophy can influence the implementation of a GraphQL service running on WordPress, talking about it even for several hours, using plenty of material that I have not included in this write-up. But I need to stop… So I’ll stop now.
I hope this article has managed to provide a good overview of the whys and hows for satisfying the WordPress philosophy in GraphQL, as done by plugin GraphQL API for WordPress.
The post Rendering the WordPress philosophy in GraphQL appeared first on CSS-Tricks.
You can support CSS-Tricks by being an MVP Supporter.
Rendering the WordPress philosophy in GraphQL published first on https://deskbysnafu.tumblr.com/
0 notes
Text
Build a Simple Web App with Express, Angular, and GraphQL
This article was originally published on the Okta developer blog. Thank you for supporting the partners who make SitePoint possible.
During the past 10 years or so, the concept of REST APIs for web services has become the bread and butter for most web developers. Recently a new concept has emerged, GraphQL. GraphQL is a query language that was invented by Facebook and released to the public in 2015. During the last three years, it has created quite a stir. Some regard it as a new revolutionary way of creating web APIs. The main difference between traditional REST and GraphQL is the way queries are sent to the server. In REST APIs you will have a different endpoint for each type of resource and the response to the request is determined by the server. Using GraphQL you will typically have only a single endpoint, and the client can explicitly state which data should be returned. A single request in GraphQL can contain multiple queries to the underlying model.
In this tutorial, I will be showing you how to develop a simple GraphQL web application. The server will run using Node and Express and the client will be based on Angular 7. You will see how easy it is to prepare the server for responding to different queries. This removes much of the work needed compared to implementing REST-style APIs. To provide an example I will create a service in which users can browse through the ATP Tennis players and rankings.
Build Your Express Server using GraphQL
I will start by implementing the server. I will assume that you have Node installed on your system and that the npm command is available. I will also be using SQLite to store the data. In order to create the database tables and import the data, I will be making use of the sqlite3 command line tool. If you haven’t got sqlite3 installed, head over to the SQLite download page and install the package that contains the command-line shell.
To start off, create a directory that will contain the server code. I have simply called mine server/. Inside the directory run
npm init -y
Next, you will have to initialize the project with all the packages that we will be needing for the basic server.
npm install --save [email protected] [email protected] [email protected] [email protected] [email protected]
Import Data to Your Express Server
Next, let’s create the database tables and import some data into them. I will be making use of the freely available ATP Tennis Rankings by Jeff Sackmann. In some directory on your system clone the GitHub repository.
git clone https://github.com/JeffSackmann/tennis_atp.git
In this tutorial, I will only be using two of the files from this repository, atp_players.csv and atp_rankings_current.csv. In your server/ directory start SQLite.
sqlite3 tennis.db
This will create a file tennis.db that will contain the data and will give you a command line prompt in which you can type SQL commands. Let’s create our database tables. Paste and run the following in the SQLite3 shell.
CREATE TABLE players( "id" INTEGER, "first_name" TEXT, "last_name" TEXT, "hand" TEXT, "birthday" INTEGER, "country" TEXT ); CREATE TABLE rankings( "date" INTEGER, "rank" INTEGER, "player" INTEGER, "points" INTEGER );
SQLite allows you to quickly import CSV data into your tables. Simply run the following command in the SQLite3 shell.
.mode csv .import {PATH_TO_TENNIS_DATA}/atp_players.csv players .import {PATH_TO_TENNIS_DATA}/atp_rankings_current.csv rankings
In the above, replace {PATH_TO_TENNIS_DATA} with the path in which you have downloaded the tennis data repository. You have now created a database that contains all ATP ranked tennis players ever, and the rankings of all active players during the current year. You are ready to leave SQLite3.
.quit
Implement the Express Server
Let’s now implement the server. Open up a new file index.js, the main entry point of your server application. Start with the Express and CORS basics.
const express = require('express'); const cors = require('cors'); const app = express().use(cors());
Now import SQLite and open up the tennis database in tennis.db.
const sqlite3 = require('sqlite3'); const db = new sqlite3.Database('tennis.db');
This creates a variable db on which you can issue SQL queries and obtain results.
Now you are ready to dive into the magic of GraphQL. Add the following code to your index.js file.
const graphqlHTTP = require('express-graphql'); const { buildSchema } = require('graphql'); const schema = buildSchema(` type Query { players(offset:Int = 0, limit:Int = 10): [Player] player(id:ID!): Player rankings(rank:Int!): [Ranking] } type Player { id: ID first_name: String last_name: String hand: String birthday: Int country: String } type Ranking { date: Int rank: Int player: Player points: Int } `);
The first two lines import graphqlHTTP and buildSchema. The function graphqlHTTP plugs into Express and is able to understand and respond to GraphQL requests. The buildSchema is used to create a GraphQL schema from a string. Let’s look at the schema definition in a little more detail.
The two types Player and Ranking reflect the contents of the database tables. These will be used as the return types to the GraphQL queries. If you look closely, you can see that the definition of Ranking contains a player field that has the Player type. At this point, the database only has an INTEGER that refers to a row in the players table. The GraphQL data structure should replace this integer with the player it refers to.
The type Query defines the queries a client is allowed to make. In this example, there are three queries. players returns an array of Player structures. The list can be restricted by an offset and a limit. This will allow paging through the table of players. The player query returns a single player by its ID. The rankings query will return an array of Ranking objects for a given player rank.
To make your life a little easier, create a utility function that issues an SQL query and returns a Promise that resolves when the query returns. This is helpful because the sqlite3 interface is based on callbacks but GraphQL works better with Promises. In index.js add the following function.
function query(sql, single) { return new Promise((resolve, reject) => { var callback = (err, result) => { if (err) { return reject(err); } resolve(result); }; if (single) db.get(sql, callback); else db.all(sql, callback); }); }
Now it’s time to implement the database queries that power the GraphQL queries. GraphQL uses something called rootValue to define the functions corresponding to the GraphQL queries.
const root = { players: args => { return query( `SELECT * FROM players LIMIT ${args.offset}, ${args.limit}`, false ); }, player: args => { return query(`SELECT * FROM players WHERE id='${args.id}'`, true); }, rankings: args => { return query( `SELECT r.date, r.rank, r.points, p.id, p.first_name, p.last_name, p.hand, p.birthday, p.country FROM players AS p LEFT JOIN rankings AS r ON p.id=r.player WHERE r.rank=${args.rank}`, false ).then(rows => rows.map(result => { return { date: result.date, points: result.points, rank: result.rank, player: { id: result.id, first_name: result.first_name, last_name: result.last_name, hand: result.hand, birthday: result.birthday, country: result.country } }; }) ); } };
The first two queries are pretty straightforward. They consist of simple SELECT statements. The result is passed straight back. The rankings query is a little more complicated because a LEFT JOIN statement is needed to combine the two database tables. Afterward, the result is cast into the correct data structure for the GraphQL query. Note in all these queries how args contains the arguments passed in from the client. You do not need to worry in any way about checking missing values, assigning defaults, or checking the correct type. This is all done for you by the GraphQL server.
All that is left to do is create a route and link the graphqlHTTP function into it.
The post Build a Simple Web App with Express, Angular, and GraphQL appeared first on SitePoint.
via SitePoint http://bit.ly/2VWBC4n
0 notes
Text
Introducing gqlgen: a GraphQL Server Generator for Go
At 99designs we’ve been on a journey to deconstruct our PHP monolith into a microservice architecture, with most new services being written in Go. During this period, our front-end team also adopted type safety, transitioning from Javascript to TypeScript & React.
By having type safety in our backend and frontend, it became apparent that our bespoke REST endpoints were not able to bridge the type-gap. We needed a way to join these type systems together and untangle our API endpoints.
What we needed was a type-safe system for APIs. GraphQL looked promising. As we explored it, however, we realized that there wasn’t a server approach out there that met all of our needs. So we developed our own, which we call gqlgen.
What is GraphQL? —
GraphQL is a query language for APIs that gives a complete and understandable description of data, and gives clients the power to ask for exactly what they need (and not get anything extraneous).
For example, we can define types: say a User has some fields, mostly scalars like name and height, but also of other complex types like location.
Unlike REST, we query a GraphQL endpoint by describing the shape of the result:
{ user(id: 10) { name, location {lat, long} } }
Fields can take arguments that operate similar to query params, and these can be at any level of the graph.
From the above query the server returns:
{ "user": { "name": "Bob", "location": { "lat": 123.456789, "lon": 123.456789 } } }
This is powerful because it gives us a shared type system both the client and server can understand, while also giving us amazing reusability. What if we wanted to plot our 3 best friends’ locations on a different screen?
{ user(id: 10) { friends(limit: 3) { name, location {lat, long} } } }
and we would get back
{ "user": { "friends": [ { "name": "Carol", "location": {"lat": 1, "lon": 1} }, { "name": "Carlos", "location": {"lat": 2, "lon": 2} }, { "name": "Charlie", "location": {"lat": 3, "lon": 3} }, ] } }
Goodbye bespoke endpoints, hello type-safe, discoverable, consistent APIs!
How does gqlgen compare to other GraphQL server approaches? —
The first thing you need to do when you decide to use GraphQL is to decide which server library to use. Turns out there are a few different approaches to defining types and executing queries, the main roles of our GraphQL server.
Defining types
The first thing we need to do for any GraphQL server is define the types. This allows the server to validate incoming requests and provide introspection APIs that can power autocomplete and other useful features. There are three main approaches to defining types:
1. Custom domain specific language
You can build up the type tree directly in your programming language of choice. This is the easiest to implement for the server library, but often results in a lot of code for the user to write. DSLs work great in some languages, but in Go they are very verbose:
var queryType = graphql.NewObject(graphql.ObjectConfig{ Name: "Query", Fields: graphql.Fields{ "brief": &graphql.Field{ Type: briefType, Args: graphql.FieldConfigArgument{ "id": &graphql.ArgumentConfig{ Type: graphql.NewNonNull(graphql.String), }, }, }, }, })
The graphql-js reference implementation uses this approach, and many server implementations have followed suit, making this the most common approach. Being entirely dynamic means you can define a schema on the fly based on dynamic input. This isn’t a common requirement, but if you need it, it’s the only way to go.
Disadvantages
Loss of (compile-time) type safety: heavy use of open interface{} and reflection.
Mixing declarative schema definition code with imperative resolver code, making dependency injection hard.
The schema definition code is incredibly verbose when compared to the purpose-built Schema Definition Language.
This approach is usually very tedious and error-prone and leaves you with something that isn’t particularly readable. It gets even worse when there are loops in your graphs.
Used by graphql-go/graphql
2. Schema first
Compare the above DSL with the equivalent Schema Definition Language (SDL):
type Query { brief(id: String!): Brief }
Short, concise and easy to read. This is also language agnostic, so your frontend team can use mocks generated from the SDL to quickly spin up a server that answers queries and start building client code concurrently with the server.
Used by 99designs/gqlgen and graph-gophers/graphql.
3. Reflection
This approach involves the least work as we don’t need to declare the GraphQL types explicitly at all. Instead, we can reflect the types from our language and build the GraphQL server from that.
Reflection sounds pretty good on paper, but if you want to use the full gamut of GraphQL features, you need to use a language that maps very closely to GraphQL. Automatically building interfaces and unions on top of a duck typed language is hard.
That being said, reflection is used to great effect in the graphql-ruby library:
class Types::ProfileType > Types::BaseObject field :id, ID, null: false field :name, String, null: false field :avatar, Types::PhotoType, null: true end
While this may work well for languages like Ruby (where DSLs are commonplace), Go’s restrictive type system limits the power of this approach.
Used by samsarahq/thunder
Executing queries
Now that we know what we are exposing, now we need to write some code to answer these GraphQL queries. Each step in the GraphQL execution phase wants to call a function that looks roughly like this:
Execute('Query.brief', brief, {id: "123"}) -> Brief
Again, there are a couple approaches to executing these queries:
1. Expose a generic function signature
The most direct approach is to expose a generic function signature directly to the user, and let them handle everything.
var queryType = graphql.NewObject(graphql.ObjectConfig{ Name: "Query", Fields: graphql.Fields{ "brief": &graphql.Field{ // other props are here but not important right now Resolve: func(p graphql.ResolveParams) (interface{}, error) { return mydb.FindBriefById(p.Args["id"].(string)) }, }, }, })
There are a few issues here:
We need to deal with unpacking args ourselves from a map[string]interface{}
id might not be a string
Is it the correct return type?
Even if it is the correct type, does it have the correct fields?
How do I inject dependencies such as a database connection?
The library can validate the result at runtime, and extensive unit testing would catch these issues.
Again, we can declare new resolvers and types at runtime without recompiling. If that’s a feature you need, you probably want this kind of approach.
Used by graphql-go/graphql and graphql-js.
2. Runtime reflection for types
We can let the user define the functions themselves with the types they expect and use reflection to validate the everything is correct.
type query struct{ db *myDb } func (q *query) Brief(id string) BriefResolver { return briefResolver{db, q.db.FindBriefById(id)} } type briefResolver struct { db *myDb *db.Brief } func (b *briefResolver) ID() string { return b.ID } func (b *briefResolver) State() string { return b.State } func (b *briefResolver) UserID() string { return b.UserID }
This reads a bit nicer, the library has done all the unpacking logic for us and we can inject dependencies. But child resolvers need to have their dependencies injected manually. There is also no compile time safety so this job falls to runtime checks. At least this time we can statically verify the whole graph on boot instead of needing 100% code coverage just to catch issues.
Used by graph-gophers/graphql-go and samsarahq/thunder
Building gqlgen —
As we explored GraphQL, we tried both graphql-go/graphql and graph-gophers/graphql-go in various projects. What we found was that graph-gophers/graphql-go has a better type system, but it wasn’t completely meeting our needs. We decided to try and incrementally make it more usable.
Generating resolver interfaces
Since Go 1.4 there has been first-class support for generating code via go generate, but none of the existing GraphQL servers were taking advantage of that. We realized that instead of doing runtime checks we could generate interfaces for the resolvers and the compiler could check that everything was implemented correctly.
// in generated code type QueryResolver interface { Brief(ctx context.Context, id string) (*Brief, error) } type Brief struct { ID string State string UserID int }
// in our code type queryResolver struct{ db *myDb } func (r *queryResolver) Brief(ctx context.Context, id string) (*Brief, error) { b, err := q.db.FindBriefById(id) if err != nil { return nil, err } return Brief { ID: b.ID, State: b.State, UserID: b.UserID, }, nil }
Great! Now our compiler could tell us when our resolver signatures didn’t match our GraphQL schema. We also switched to a more MVC-like approach, where the resolver graph is static and dependencies can be injected once at boot time, rather then need to be injected into every node.
Binding to models
Even after generating type safe resolver interfaces, we were still writing a bit of manual mapper code. What if we let the code generator inspect our existing database model to see if it fit the GraphQL schema? If it did, we could use that type directly in the resolver signatures.
// in generated code type QueryResolver interface { Brief(ctx context.Context, id string) (*db.Brief, error) }
// in our code type queryResolver struct{ db *myDb } func (r *queryResolver) Brief(ctx context.Context, id string) (*db.Brief, error) { return q.db.FindBriefById(id) }
Perfect. Now our resolver code was really just type safe glue! This works great for exposing databases models or even well-typed API clients (protobuf, Thrift) over GraphQL.
But what should happen to fields that don’t exist on the database model? Let’s generate another resolver.
// in generated code type BriefResolver interface { Owner(ctx context.Context, *db.Brief) (*db.User, error) }
// in our code type briefResolver struct{ db *myDb } func (r *briefResolver) Owner(ctx context.Context, brief *db.Brief) (*db.User, error) { return q.db.FindUserById(brief.OwnerID) }
Generate marshalling and execution code
We have written almost no boilerplate and have complete type safety in our resolvers! But most of the execution phase is still using the original reflection system from graph-gophers and reflection is never clear. Let’s replace the reflection-based argument unpacking and resolver call logic with generated code:
func (ec *executionContext) _Brief(ctx context.Context, sel ast.SelectionSet, obj *model.Brief) graphql.Marshaler { fields := graphql.CollectFields(ctx, sel, briefImplementors) out := graphql.NewOrderedMap(len(fields)) for i, field := range fields { out.Keys[i] = field.Alias switch field.Name { case "__typename": out.Values[i] = graphql.MarshalString("Brief") case "id": out.Values[i] = graphql.MarshalString(obj.ID) case "state": out.Values[i] = graphql.MarshalString(obj.State) case "user": out.Values[i] = _MarshalUser(ec.resolvers.User.Owner(ctx, obj)) } } return out }
*note: This is a simplified example of the generated code from gqlgen 0.5.1. The real code handles concurrent execution and error bubbling.
We can statically generate all the field selection, binding and json marshalling. We don’t need a single line of reflection to execute a GraphQL query! Now the compiler can catch errors all the way through for us. It can see every codepath through the runtime and catch the majority of bugs. We get great stack traces when things break, and this lets us iterate quickly on features inside gqlgen and in our apps.
At about this point we converted one of our development apps over from graphql-go, the PR:
removed 600 lines of hand written, hard to read, error prone DSL
added 70 lines of schema
added 70 lines of type safe resolver code
added 1000 lines of generated code
Get involved —
From Christopher Biscardis Going GraphQL talk at Gopherpalooza 2018
Fast forward 6 months and we’ve seen 619 commits from 31 different contributors into gqlgen, making it one of the most feature-complete GraphQL libraries for Go. We’ve had gqlgen in production on 99designs for most of this year, and we’ve seen a really positive response from the Go/GraphQL community.
This is just beginning! Some of the big features landing soon include:
Better directive support via a plugin system — being able to annotate the schema with validation and build plugins that allow seamless integration with codegen based ORMs like Prisma or XO.
Schema stitching — joining together multiple GraphQL servers, to expose a single, consistent org-wide view.
Schema-based gRPC/Twirp/Thrift bindings — being able to bind external services into your graph as easy as @grpc(service:”http://service”, method:”Foobar”)
We think gqlgen is the best way to build a GraphQL server in Go and possibly even any language. We’ve shipped a bunch of features so far, with many more to come and hope you’ll join us on GitHub or Gitter and join the adventure.
—
This post was written in collaboration with Luke Cawood and Mathew Byrne.
The post Introducing gqlgen: a GraphQL Server Generator for Go appeared first on 99designs.
via https://99designs.co.uk/blog/
0 notes
Photo

Build a Simple Web App with Express, Angular, and GraphQL
This article was originally published on the Okta developer blog. Thank you for supporting the partners who make SitePoint possible.
During the past 10 years or so, the concept of REST APIs for web services has become the bread and butter for most web developers. Recently a new concept has emerged, GraphQL. GraphQL is a query language that was invented by Facebook and released to the public in 2015. During the last three years, it has created quite a stir. Some regard it as a new revolutionary way of creating web APIs. The main difference between traditional REST and GraphQL is the way queries are sent to the server. In REST APIs you will have a different endpoint for each type of resource and the response to the request is determined by the server. Using GraphQL you will typically have only a single endpoint, and the client can explicitly state which data should be returned. A single request in GraphQL can contain multiple queries to the underlying model.
In this tutorial, I will be showing you how to develop a simple GraphQL web application. The server will run using Node and Express and the client will be based on Angular 7. You will see how easy it is to prepare the server for responding to different queries. This removes much of the work needed compared to implementing REST-style APIs. To provide an example I will create a service in which users can browse through the ATP Tennis players and rankings.
Build Your Express Server using GraphQL
I will start by implementing the server. I will assume that you have Node installed on your system and that the npm command is available. I will also be using SQLite to store the data. In order to create the database tables and import the data, I will be making use of the sqlite3 command line tool. If you haven’t got sqlite3 installed, head over to the SQLite download page and install the package that contains the command-line shell.
To start off, create a directory that will contain the server code. I have simply called mine server/. Inside the directory run
npm init -y
Next, you will have to initialize the project with all the packages that we will be needing for the basic server.
npm install --save [email protected] [email protected] [email protected] [email protected] [email protected]
Import Data to Your Express Server
Next, let’s create the database tables and import some data into them. I will be making use of the freely available ATP Tennis Rankings by Jeff Sackmann. In some directory on your system clone the GitHub repository.
git clone https://github.com/JeffSackmann/tennis_atp.git
In this tutorial, I will only be using two of the files from this repository, atp_players.csv and atp_rankings_current.csv. In your server/ directory start SQLite.
sqlite3 tennis.db
This will create a file tennis.db that will contain the data and will give you a command line prompt in which you can type SQL commands. Let’s create our database tables. Paste and run the following in the SQLite3 shell.
CREATE TABLE players( "id" INTEGER, "first_name" TEXT, "last_name" TEXT, "hand" TEXT, "birthday" INTEGER, "country" TEXT ); CREATE TABLE rankings( "date" INTEGER, "rank" INTEGER, "player" INTEGER, "points" INTEGER );
SQLite allows you to quickly import CSV data into your tables. Simply run the following command in the SQLite3 shell.
.mode csv .import {PATH_TO_TENNIS_DATA}/atp_players.csv players .import {PATH_TO_TENNIS_DATA}/atp_rankings_current.csv rankings
In the above, replace {PATH_TO_TENNIS_DATA} with the path in which you have downloaded the tennis data repository. You have now created a database that contains all ATP ranked tennis players ever, and the rankings of all active players during the current year. You are ready to leave SQLite3.
.quit
Implement the Express Server
Let’s now implement the server. Open up a new file index.js, the main entry point of your server application. Start with the Express and CORS basics.
const express = require('express'); const cors = require('cors'); const app = express().use(cors());
Now import SQLite and open up the tennis database in tennis.db.
const sqlite3 = require('sqlite3'); const db = new sqlite3.Database('tennis.db');
This creates a variable db on which you can issue SQL queries and obtain results.
Now you are ready to dive into the magic of GraphQL. Add the following code to your index.js file.
const graphqlHTTP = require('express-graphql'); const { buildSchema } = require('graphql'); const schema = buildSchema(` type Query { players(offset:Int = 0, limit:Int = 10): [Player] player(id:ID!): Player rankings(rank:Int!): [Ranking] } type Player { id: ID first_name: String last_name: String hand: String birthday: Int country: String } type Ranking { date: Int rank: Int player: Player points: Int } `);
The first two lines import graphqlHTTP and buildSchema. The function graphqlHTTP plugs into Express and is able to understand and respond to GraphQL requests. The buildSchema is used to create a GraphQL schema from a string. Let’s look at the schema definition in a little more detail.
The two types Player and Ranking reflect the contents of the database tables. These will be used as the return types to the GraphQL queries. If you look closely, you can see that the definition of Ranking contains a player field that has the Player type. At this point, the database only has an INTEGER that refers to a row in the players table. The GraphQL data structure should replace this integer with the player it refers to.
The type Query defines the queries a client is allowed to make. In this example, there are three queries. players returns an array of Player structures. The list can be restricted by an offset and a limit. This will allow paging through the table of players. The player query returns a single player by its ID. The rankings query will return an array of Ranking objects for a given player rank.
To make your life a little easier, create a utility function that issues an SQL query and returns a Promise that resolves when the query returns. This is helpful because the sqlite3 interface is based on callbacks but GraphQL works better with Promises. In index.js add the following function.
function query(sql, single) { return new Promise((resolve, reject) => { var callback = (err, result) => { if (err) { return reject(err); } resolve(result); }; if (single) db.get(sql, callback); else db.all(sql, callback); }); }
Now it’s time to implement the database queries that power the GraphQL queries. GraphQL uses something called rootValue to define the functions corresponding to the GraphQL queries.
const root = { players: args => { return query( `SELECT * FROM players LIMIT ${args.offset}, ${args.limit}`, false ); }, player: args => { return query(`SELECT * FROM players WHERE id='${args.id}'`, true); }, rankings: args => { return query( `SELECT r.date, r.rank, r.points, p.id, p.first_name, p.last_name, p.hand, p.birthday, p.country FROM players AS p LEFT JOIN rankings AS r ON p.id=r.player WHERE r.rank=${args.rank}`, false ).then(rows => rows.map(result => { return { date: result.date, points: result.points, rank: result.rank, player: { id: result.id, first_name: result.first_name, last_name: result.last_name, hand: result.hand, birthday: result.birthday, country: result.country } }; }) ); } };
The first two queries are pretty straightforward. They consist of simple SELECT statements. The result is passed straight back. The rankings query is a little more complicated because a LEFT JOIN statement is needed to combine the two database tables. Afterward, the result is cast into the correct data structure for the GraphQL query. Note in all these queries how args contains the arguments passed in from the client. You do not need to worry in any way about checking missing values, assigning defaults, or checking the correct type. This is all done for you by the GraphQL server.
All that is left to do is create a route and link the graphqlHTTP function into it.
The post Build a Simple Web App with Express, Angular, and GraphQL appeared first on SitePoint.
by Holger Schmitz via SitePoint http://bit.ly/2Ddhxjj
0 notes